
This article will demonstrate how to integrate vRealize Operations Manager with Workspace ONE Access (formally known as vRealize identity Manager) and add vROPS to Web Apps catalog. vRIDM gives us the ability to provides IDaaS (Identity as a Service). vRIDM acts as a broker between our identity providers and applications. It handles conditional-based access, SSO, unified apps catalog, and many other things. For example, when we install vRealize Automation, it is automatically registered to Identity Manager, and a website is added to the catalog. From a user perspective, you can log into vRIDM and have SSO access to all apps integrated with it. That’s a cool thing. From the other site, vROPS is not integrated by default with Identity Manager, and this article will provide us a short instruction on how to do that. It will be divided into two parts.
- Part I: Add vRIDM as a authentication provider to vROPS.
- Part II: Add vROPS website as a vRIDM catalog item.
Part I: Add vRIDM as a authentication provider to vROPS
Log to Operations Manager console and go to: Administration->Access->Authentication Sources and click Add.
Source Display Name: <choose your own>
Source Type: VMware Identity Manager
Host: vridm.blanketvm.com
Port: 443
Tenant: blank
Username: admin
Redirect FQDN/IP: vridm.blanketvm.com (It is very important to choose correct form. For example i have certificate only for FQDN, and this field will be used for user redirection).

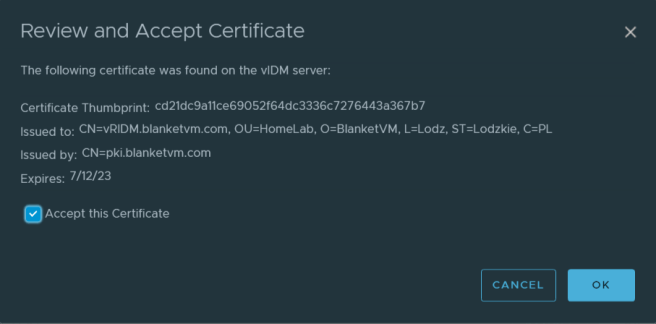
Click Test and accept certificate.
Part II: Add vROPS website as a vRIDM catalog item
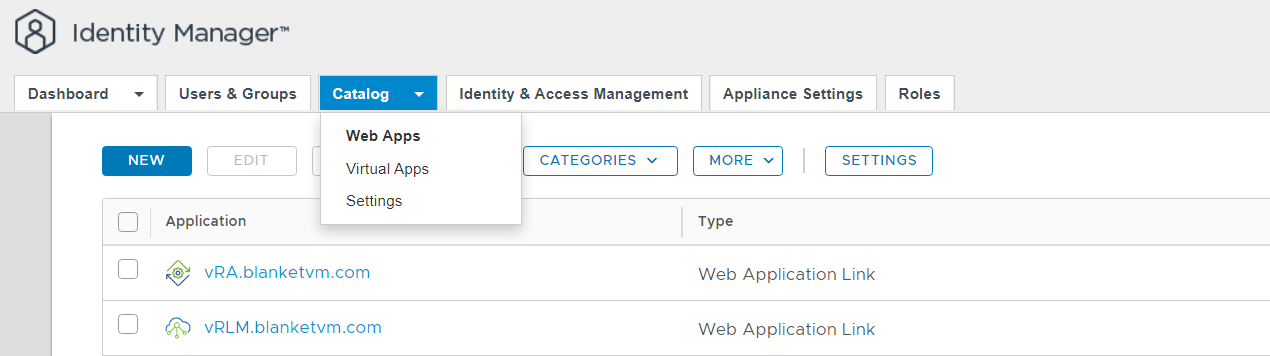
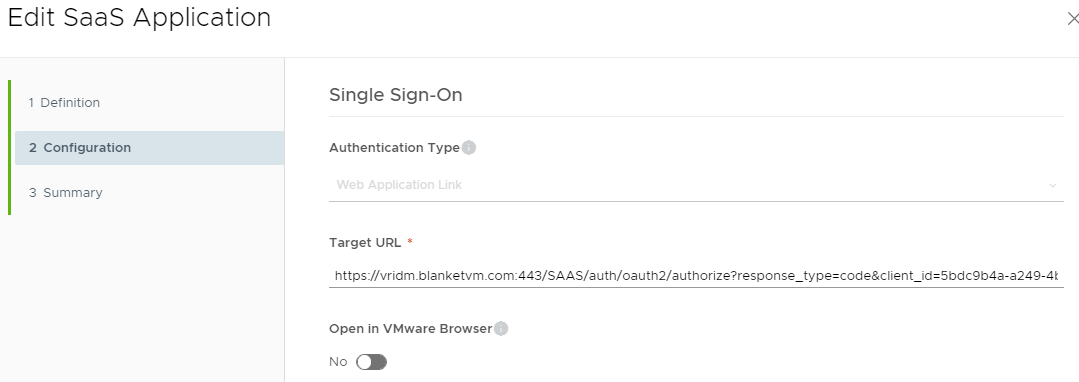
Now, we have to switch console to vRIDM. Log into and go to: Catalog->Web Apps and click New. Then fill all fields in the same way as below:

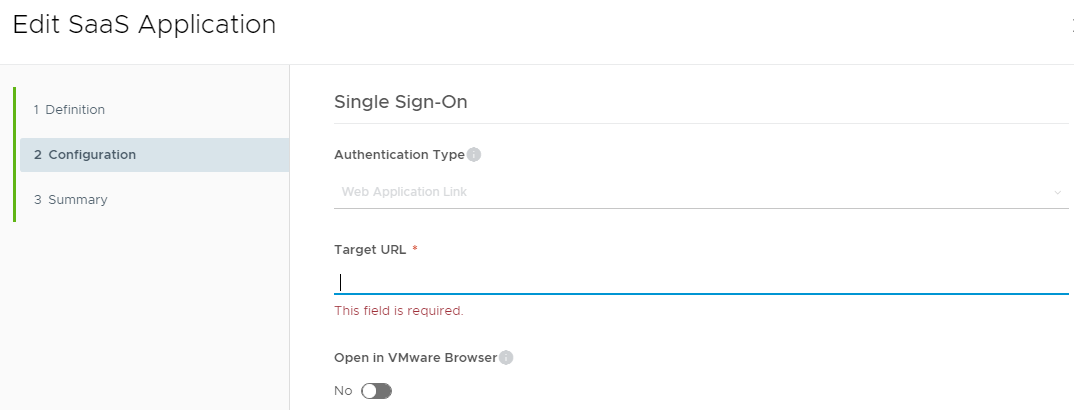
And here we must stop for a second. What URL should we put to make SSO? Fill it with vROPS FQDN for a while, and save. We need to find correct URL. Open web browser and go to your vROPS FQDN (in my case: https://vrops.blanketvm.com), and do to vRIDM login page like below:
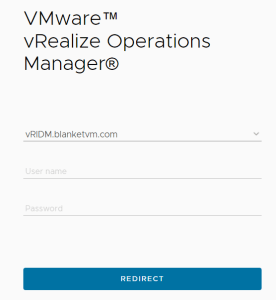
Right-click on-page and go to View Page Source or use shortcut Ctrl+U (I use Chrome. If you use another browser procedure can be a little different). Because we want to skip this redirect page we need to look for “redirect vRIDM” part in source page.
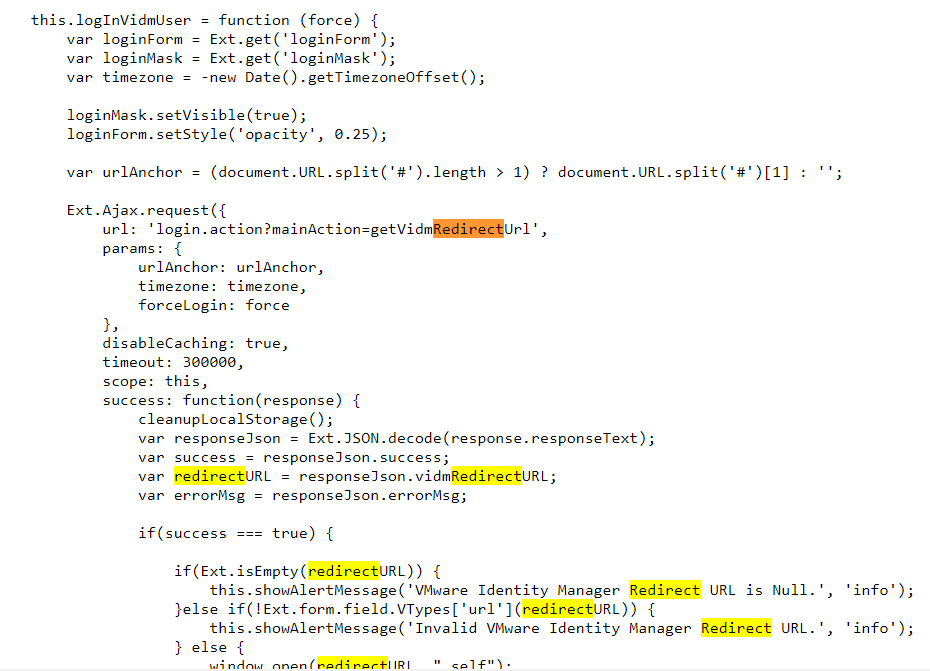
We can see that URL part is: ‘login.action?mainAction=getVidmRedirectUrl‘. That’s what we are looking for! Open a browser and open website: https://<vropsFQDN>/ui/login.action?mainAction=getVidmRedirectUrl (https://vrops.blanketvm.com/ui/login.action?mainAction=getVidmRedirectUrl). You should get vRIDM URL like below. If you have a problem, be sure that you are not logged into the vROPS console.

The highlighted part is what we need to copy and paste into the target URL in vRIDM.
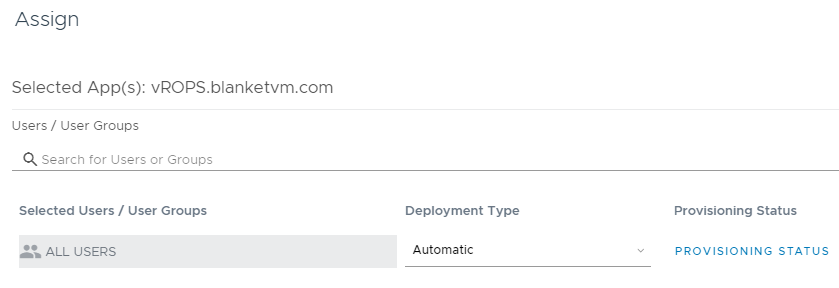
Click Save. Almost all is done. Now we need to assign our Web App to users. You can do it by select our Web App on list (Catalog->Web Apps) and click: Assign.
That’s all. Let’s test it. Log out from the vRIDM console and log as a user that has assigned our Web App. You should see the vROPS website, and when you click on it, you will be redirected to the vROPS console, and you will not be asked for a password (of course, you need to have privileges to log into the vROPS console!)


One thought on “How to add vRealize Operations Manager 8.x to vRealize Identity Manager Web Apps catalog”