
vRealize Operations Manager is a powerful tool that enables and simplifies performance, capacity, and cost optimization in our environment. Today I want to focus on actions that we can run from the vROPS console. By default, The actions available in vRealize Operations Manager allow us to modify the state or configuration of selected objects in vCenter. But what if you cannot find appropriate action on the list? We can use the vRealize Orchestrator Management Pack and build, import, and run a vRO workflow as a resource action. It can significantly extend vROPS functionality. Below I am going to show how to configure the integration and add custom actions.
Prerequisites:
- vRealize Operations Manager 8.x (Advanced or higher edition)
- vRealize Orchestrator 8.x (Standalone or vRA Embedded)
Import and configure Management Pack for vRealize Orchestrator:
1. Get Management Pack for vRealize Orchestrator from VMware Marketplace.
You can find management pack here:
https://marketplace.cloud.vmware.com/services/details/management-pack-for-vrealize-orchestrator?slug=true
2. Go to vROPS -> Administration -> Repository -> Add/Upgrade and install downloaded management pack.

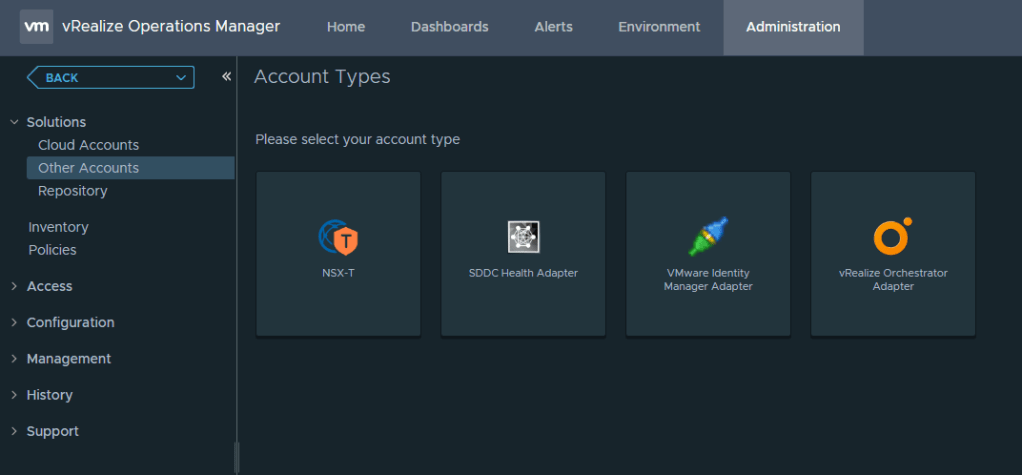
3. Configure vRO account (Administration -> Other Accounts -> Add Account -> vRealize Orchestrator Adapter).
Name: <Choose your own name>
Description: <Type your description>
vRealize Orchestrator Host: <FQDN to vRO Host or Cluster>
Port: 443
Auto Discovery: Yes
Credential: <vRO User with sufficient privileges>
Collector/Group: <Choose vROPS collector group>

Then, wait few minutes and check if data collection works fine.
Configure Package Discovery:
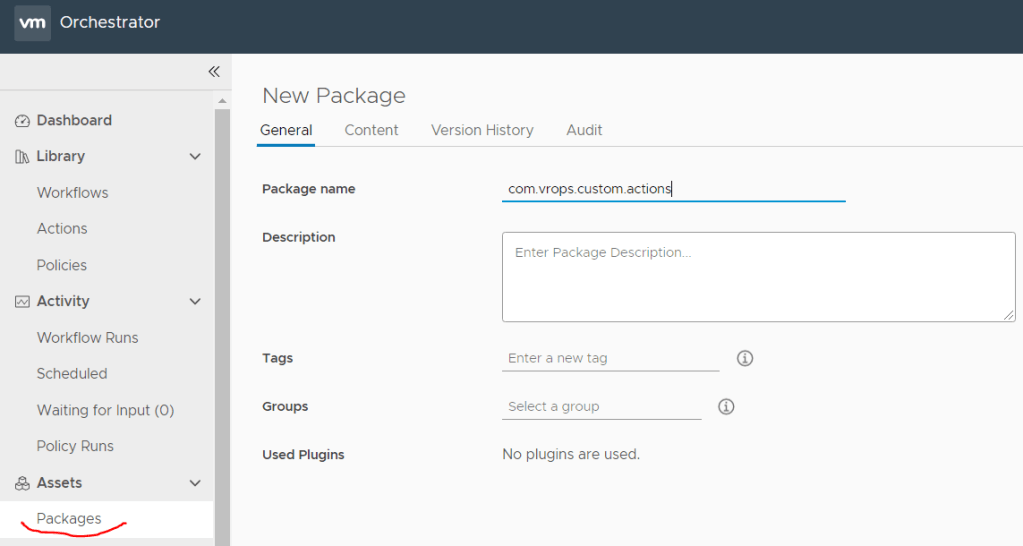
To import workflow to vROPS it must be included in vRO Package. First we will go to vRealize Orchestrator and create new package.
1. Go to vRO -> Package -> New Package and type name of new package.
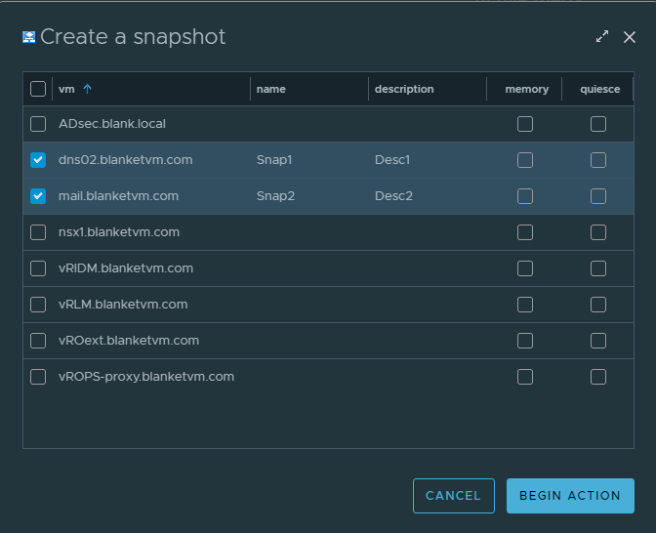
2. On Content tab Add your workflow. In this example I used the “Create a snapshot” workflow that comes by default with vCenter plugin.
Remember that if you want to interact with vCenter, vRO must have added the vCenter to inventory. How to configure the vCenter instance in vRO? You can find it here.
When you create package, vRO automatically will add all dependent actions, workflows etc. to package.

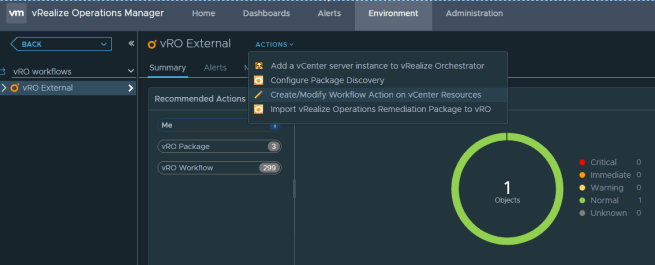
3. On the vROPS menu, click Environment and under Management Pack for vRealize Orchestrator, select vRO Instance that we configured ealier and from actions menu choose “Configure Package Discovery“.

4. In the test box (you must resize it and click inside) add new line contains name of our package. Then click Begin Action

5. To track the progress of the task, go to the Recent Tasks section under History in the Administration menu. Package discovery starts after the first content cycle.

Create/Modify Workflow Action on vCenter Resources:
1. On the vROPS menu, click Environment and under Management Pack for vRealize Orchestrator, select vRO Instance that we configured ealier and from actions menu choose “Create/Modify Workflow Action on vCenter Resources“.
2. Find your workflow and configure and begin action (to make actions visible, we need to wait at least 5 minutes)
– Available on Resource Type: Resources that have this action configured.
– Action Target Type: Resources that are target to run workflow.
– Resource Type: Resource that you want to choose to add/remove action (in our example, we want to run action on host system level to make a snapshots of all VMs on host)
– Target Resource Type: Target resource (in our case it will be virtual machine).
– Operation: Add/Remove
In our example, we want to add action on Host System and action will be performed on all VMs on that host.

Test action:
1. Find one of your ESXi Host and choose new action.

2. Fill all fields that are required in your workflow, start action and monitor in Recent Tasks history.

Summary:
As you can see, in a simple way, you can extend vROPS functionality. If vRO workflows scar you a little, don’t worry. There is a lot of build-in workflows that can be useful for you! Just try!
