
Introduction:
As we continue our journey through deploying VMware Cloud Foundation (VCF) 9, we now arrive at one of the most critical stages of the stack — Single Sign-On (SSO) integration. In this fourth part of the series, we’ll walk through the configuration of VCF Identity Broker and its integration with vCenter Server (other solutions like VCF Operations, operations for Logs, or Automation will be covered in the following posts).
Properly configuring SSO not only enhances security and user experience, but it’s also essential for ensuring seamless authentication across your VCF environment. With the introduction of the Identity Broker service in the VCF, VMware now offers a more robust and centralized approach to managing identity federation, making it easier to integrate with corporate identity providers (IdPs) like Active Directory Federation Services (ADFS), Okta, or Microsoft Entra ID (formerly Azure AD).
In this post, we’ll cover:
- What the Identity Broker is and why it matters
- How to configure the Identity Broker in VCF 9
- Integration set up between Identity Broker and vCenter SSO
- Common pitfalls and tips for a successful integration
Let’s dive into the configuration process and see how to securely bridge your identity services with the VMware ecosystem.
If you didn’t see previous posts, go to:
VCF 9 Deployment PART1: Topology, ESX Host Preparation and VCF Installer deployment
VCF 9 Deployment PART2: VCF deployment
VCF 9 Deployment PART3: VCF Operation for Logs deployment.
VCF Identity Broker deployment modes:
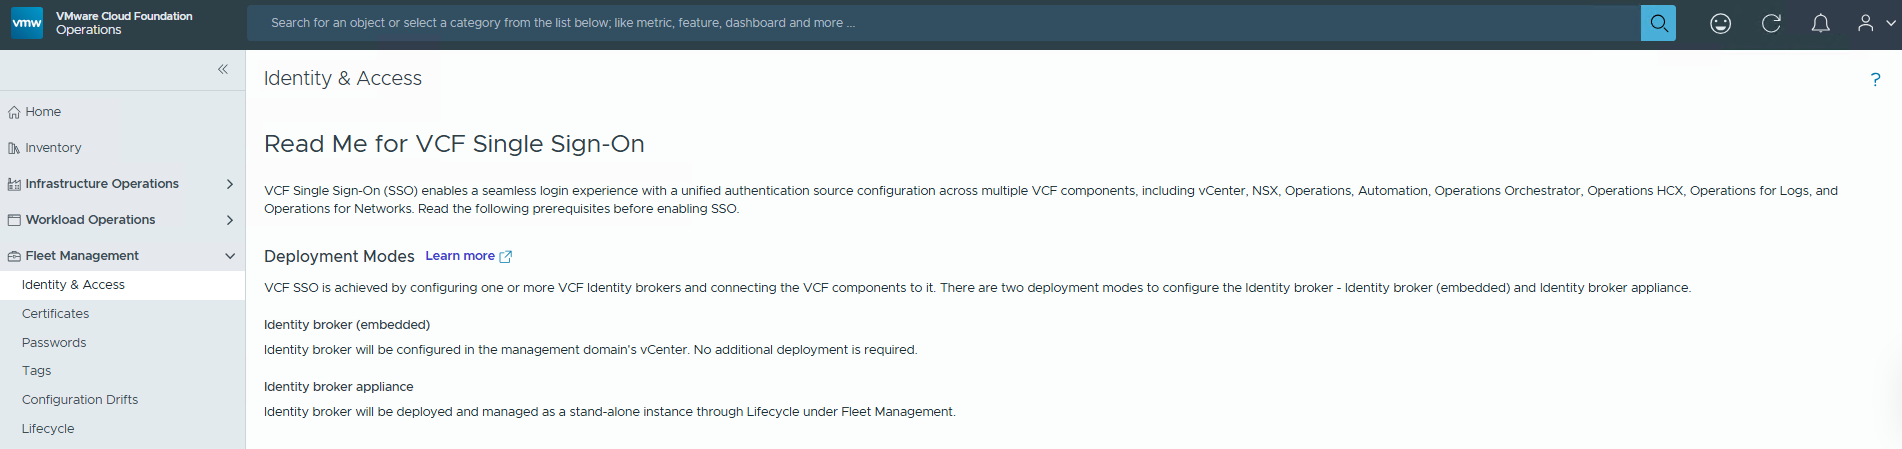
VCF Single Sign-On (SSO) enables a seamless login experience with a unified authentication source configuration across multiple VCF components, including vCenter, NSX, Operations, Automation, Operations Orchestrator, Operations HCX, Operations for Logs, and Operations for Networks.
Deployment models:
- Embedded – Identity broker will be configured in the management domain’s vCenter. No additional deployment is required.
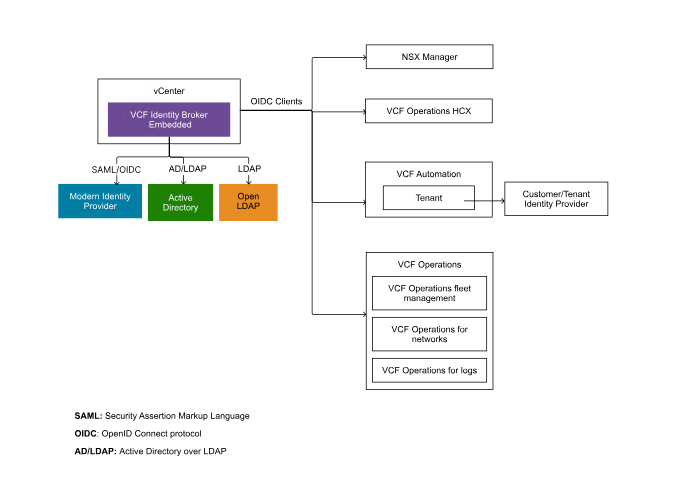
- Appliance – VCF Identity Broker is deployed as a stand-alone appliance using VCF Operations fleet management within the management domain of the chosen VCF Instance. The VCF Identity Broker appliance is a three-node cluster.

For more details, go here:
VCF Identity Broker configuration:
- Log in to the VCF Operations that was deployed in the second part using the user:
admin. In my case, it is
https://vcf9-md01-vrops01a.blanketvm.com.

- Go to
Fleet Management -> Identityand Access and start configuring the VCF SSO.
The first thing is to be familiar with the requirements and details about the configuration:
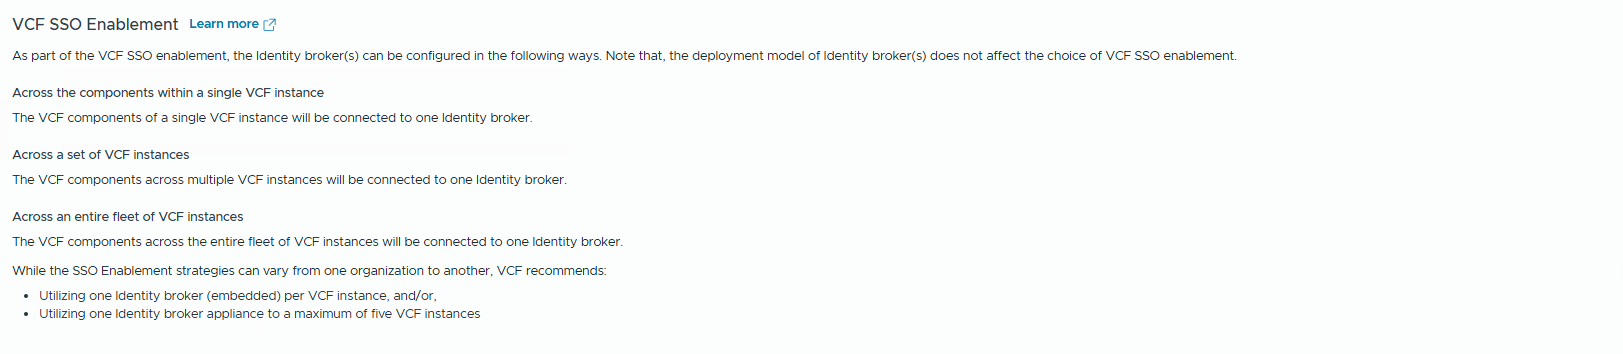
Read the VCF SSO Enablement and think about a strategy that suits your requirements:
Across the components within a single VCF instance
The VCF components of a single VCF instance will be connected to one Identity broker.
Across a set of VCF instances
The VCF components across multiple VCF instances will be connected to one Identity broker.
Across an entire fleet of VCF instances
The VCF components across the entire fleet of VCF instances will be connected to one Identity broker. While the SSO Enablement strategies can vary from one organization to another, VCF recommends:
– Utilizing one Identity broker (embedded) per VCF instance, and/or,
– Utilizing one Identity broker appliance to a maximum of five VCF instances
- Take a look at the
Prerequisitessection. There are many critical topics.
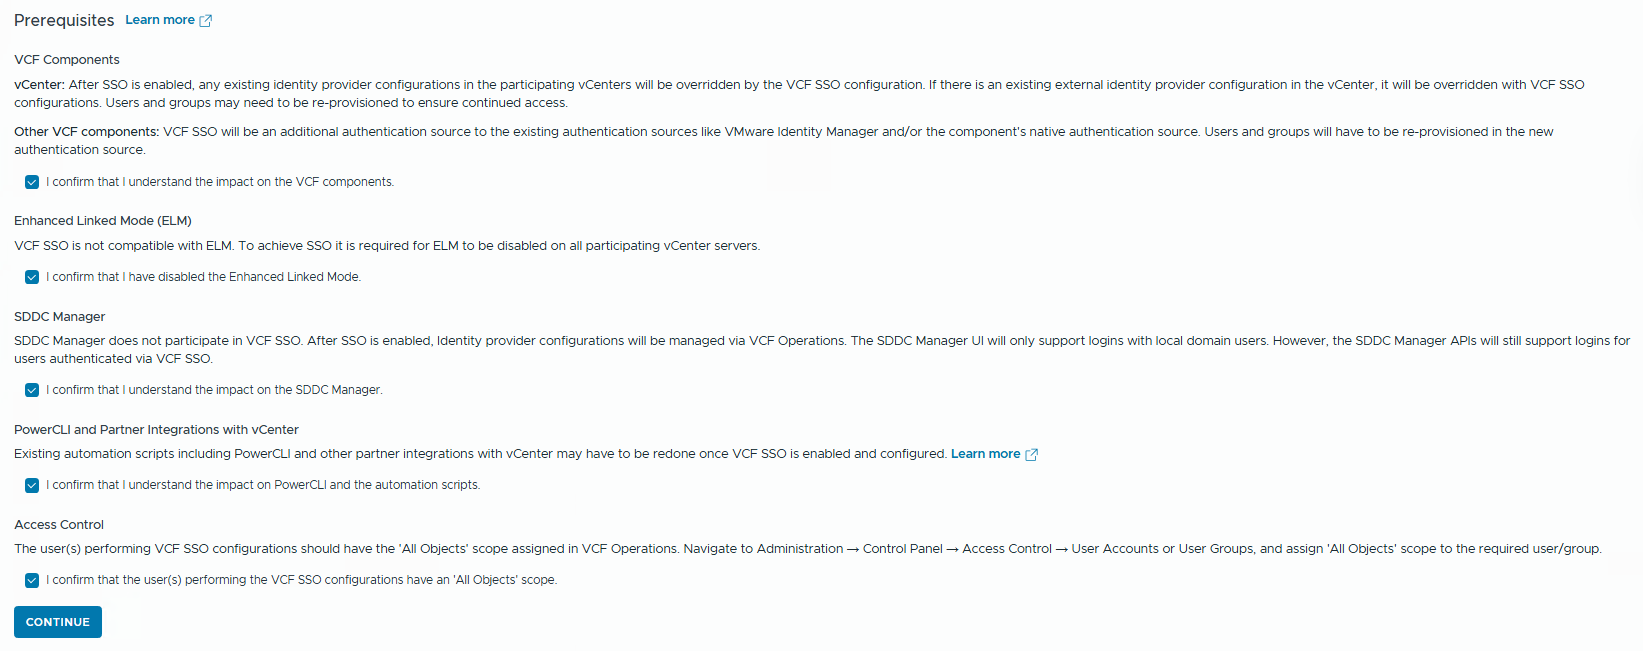
VCF Components
vCenter: After SSO is enabled, any existing identity provider configurations in the participating vCenters will be overridden by the VCF SSO configuration. If there is an existing external identity provider configuration in the vCenter, it will be overridden with VCF SSO configurations. Users and groups may need to be re-provisioned to ensure continued access.
Other VCF components: VCF SSO will be an additional authentication source to the existing authentication sources, like VMware Identity Manager and/or the component’s native authentication source. Users and groups will have to be re-provisioned in the new authentication source.
Enhanced Linked Mode (ELM)
VCF SSO is not compatible with ELM. To achieve SSO, it is required for ELM to be disabled on all participating vCenter servers.
Yes, that’s true…..ELM is deprecated, and there will be a new feature in the VCF operations to create a single pane of glass.
SDDC Manager
SDDC Manager does not participate in VCF SSO. After SSO is enabled, Identity provider configurations will be managed via VCF Operations. The SDDC Manager UI will only support logins with local domain users. However, the SDDC Manager APIs will still support logins for users authenticated via VCF SSO.
PowerCLI and Partner Integrations with vCenter
Existing automation scripts, including PowerCLI and other partner integrations with vCenter, may have to be redone once VCF SSO is enabled and configured.
Access Control
The users performing VCF SSO configurations should have the ‘All Objects’ scope assigned in VCF Operations. Navigate to Administration → Control Panel → Access Control → User Accounts or User Groups, and assign ‘All Objects’ scope to the required user/group.
Yup, that’s why we’re doing this on the admin account.
IF YOU ARE READY, click Continue.
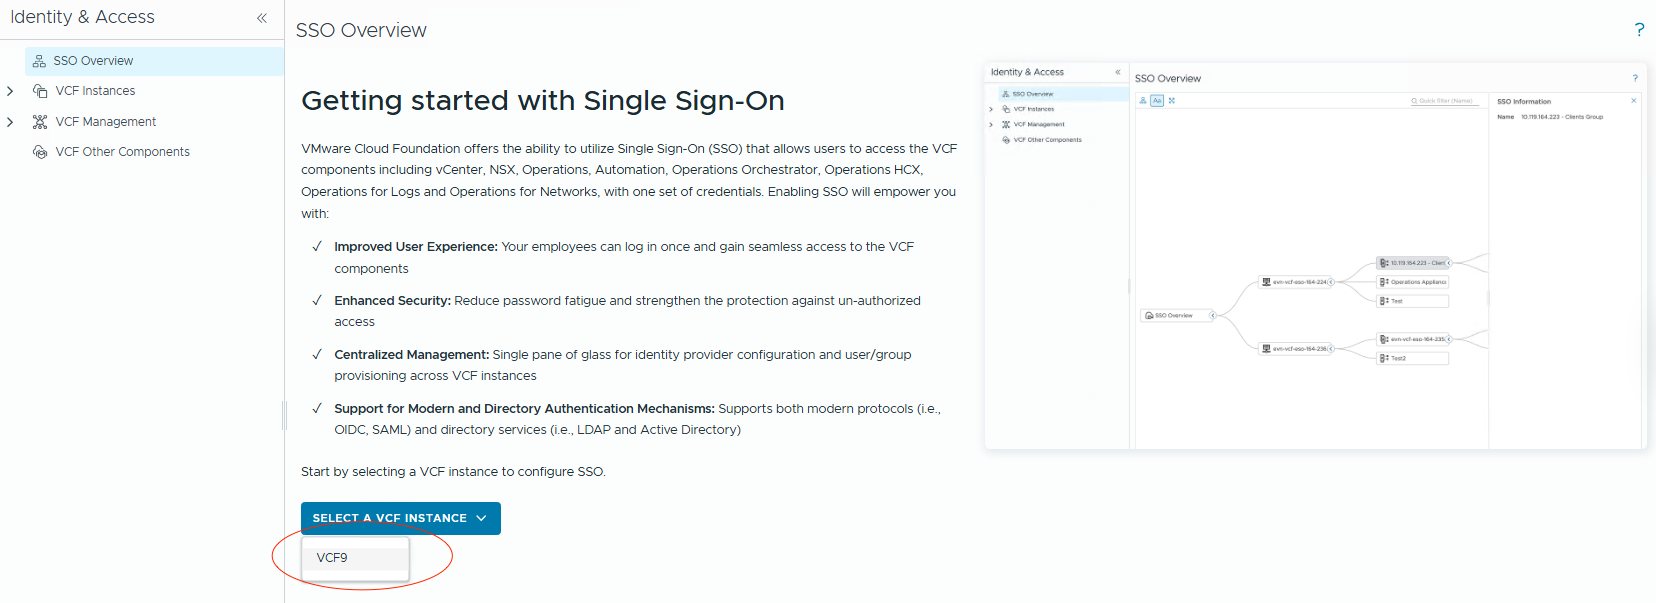
- On the
Getting Startedpage, select VCF Instance and continue.
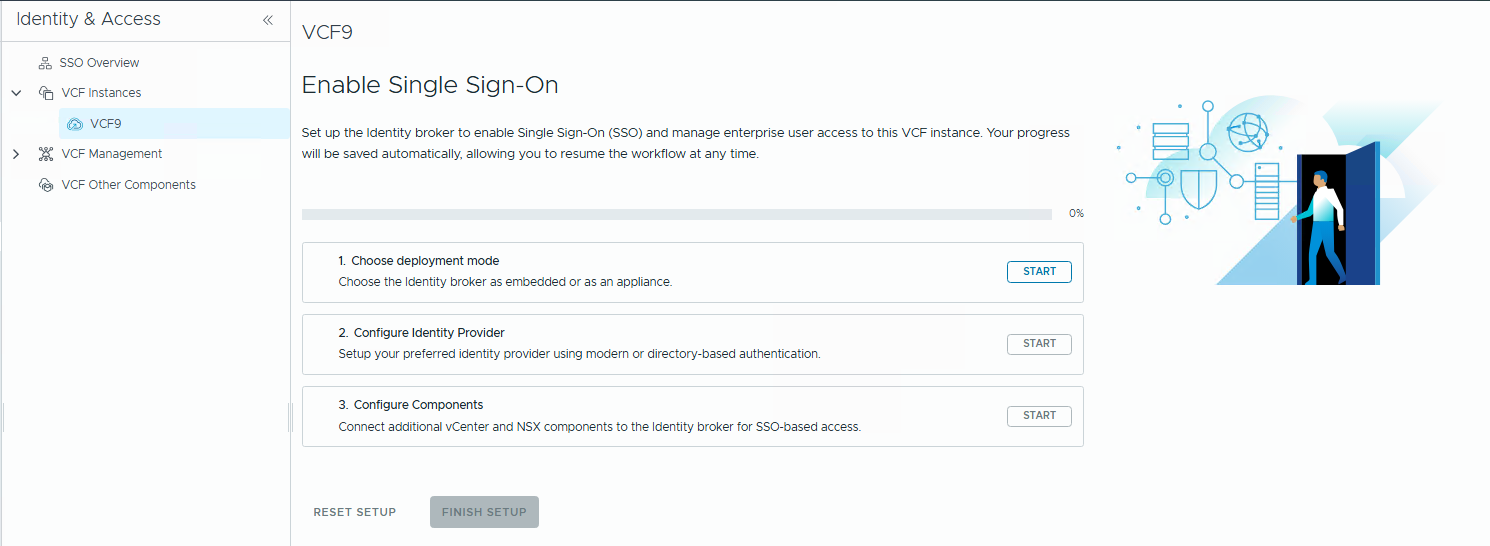
- On the
Enable Single Sign-Onpage, click theStartbutton to choose the deployment mode.
In my case, I am going to use only one VCF Instance, so I choose Embedded mode.
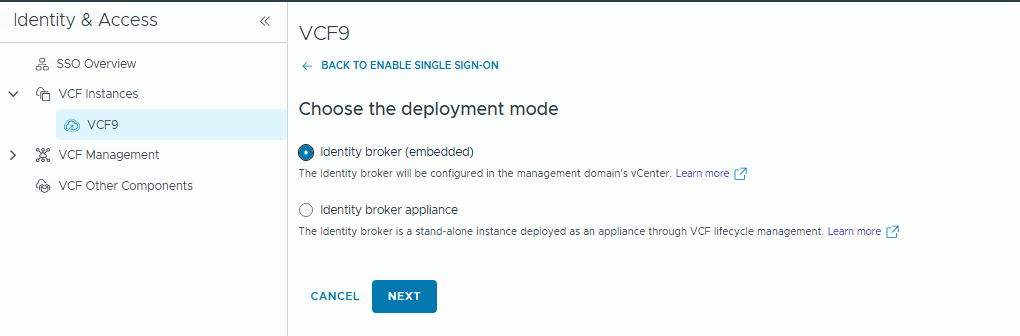
Click Next.
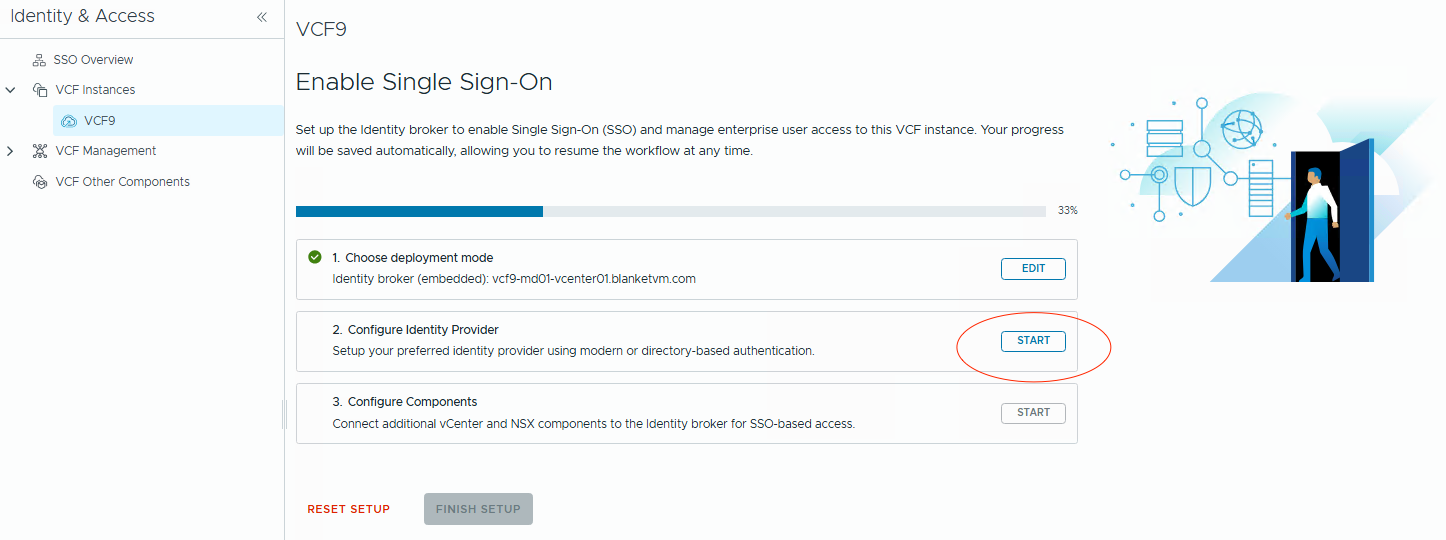
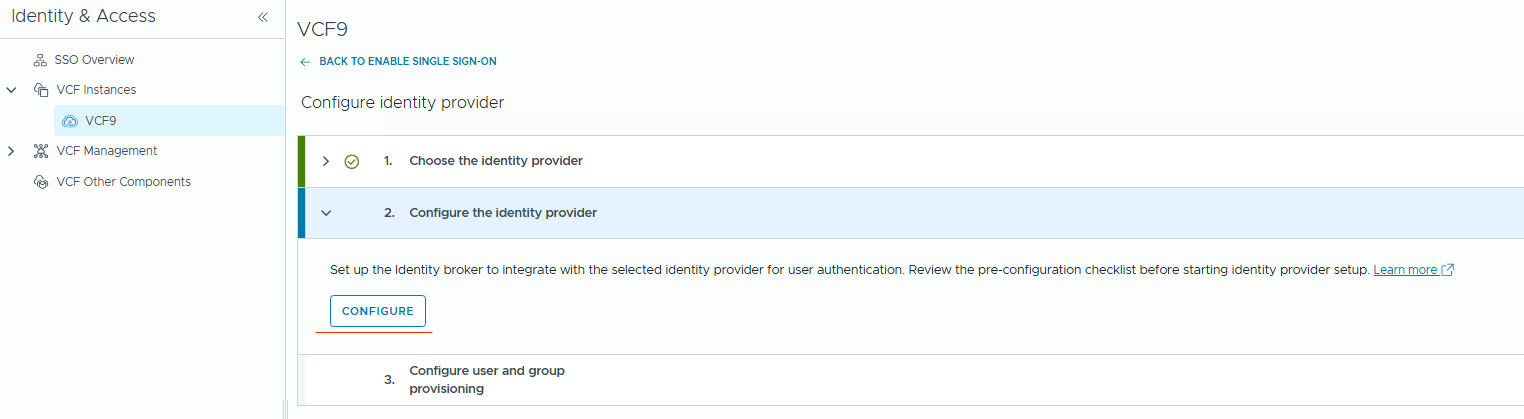
- After selecting the deployment mode, click the
Startbutton next to theConfigure Identity Brokersection.
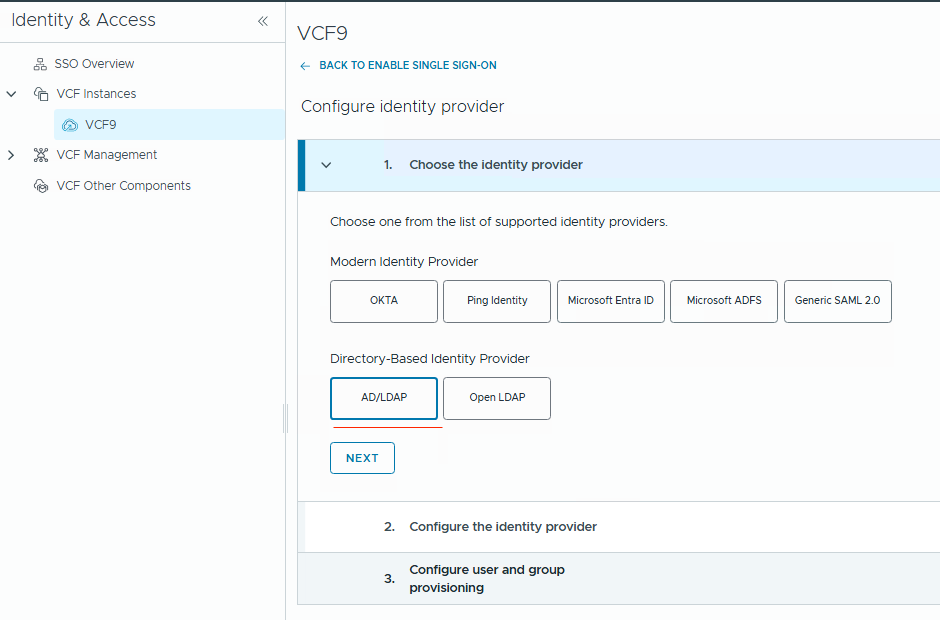
- Choose your Identity Provider. In my lab, I use classic
Active Directory over LDAPS. ClickNext.
- Now, configure your LDAPS connection.
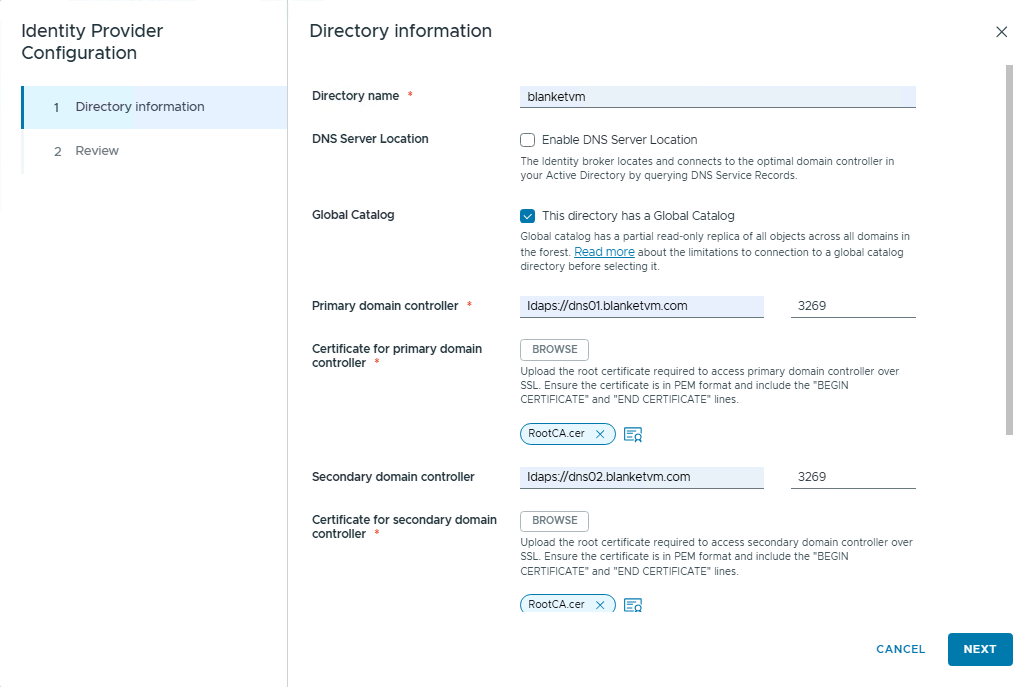
Directory name: Type the name of your directory.
DNS Server Location: If you want to use that feature, you will not have to select particular Domain Controllers, but Identity Broker will use DNS lookup to choose the best controller.
Global Catalog: Select if your Domain Controller is a Global Catalog. NOTE: There are some limitations in VCF9 regarding the Global Catalog. See:
https://knowledge.broadcom.com/external/article/386869/limitations-of-choosing-global-catalog-i.html
Primary and Secondary domain controller: if you do not use DNS Lookup, you must provide a domain controller in the format:
For LDAP:
ldap://<domainController> port: 389 or 3268 if Global Catalog
For LDAPS
ldaps://<domainController> port: 636 or 3269 if Global Catalog
For higher security, I will use LDAPS.
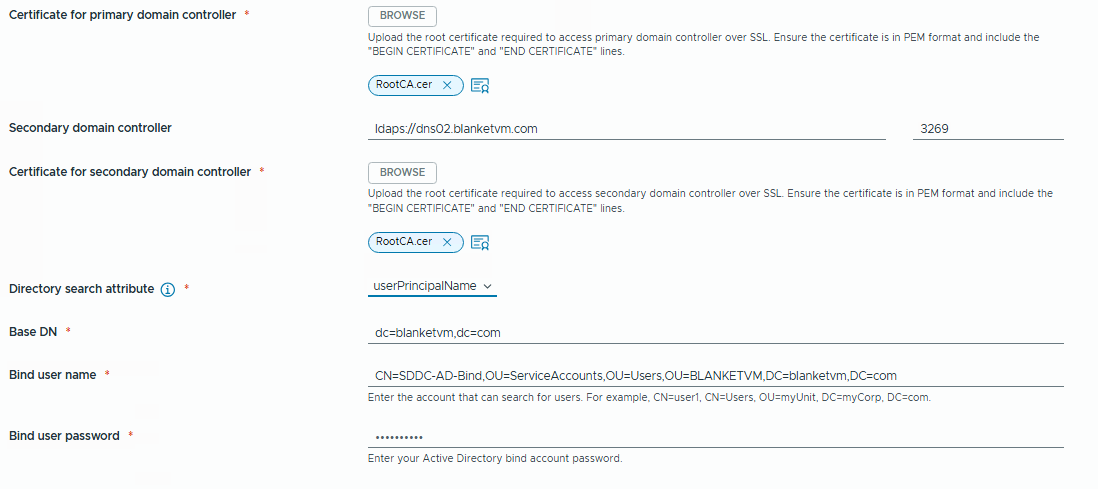
Certificate for controllers: RootCA and Intermediate CAs to trust Domain Controllers in Base64 format.
Directory Search Attribute: Use suggested userPrincipalName instead of sAMAccountName for better performance.
Base DN: Distinguished Name of the Organization Unit where Identity Broker will search for users and groups.
Bind User Name: Distinguished Name of the user for integration. The user must have only read-only permissions to the domain (Domain User).
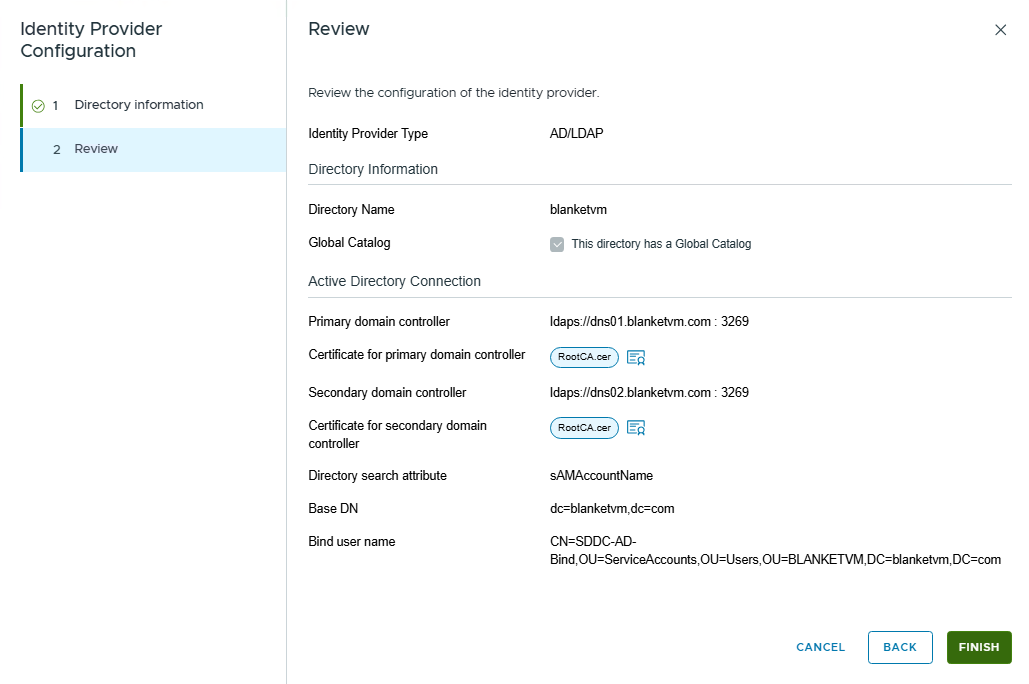
Click Finish. The wizard will check connectivity.
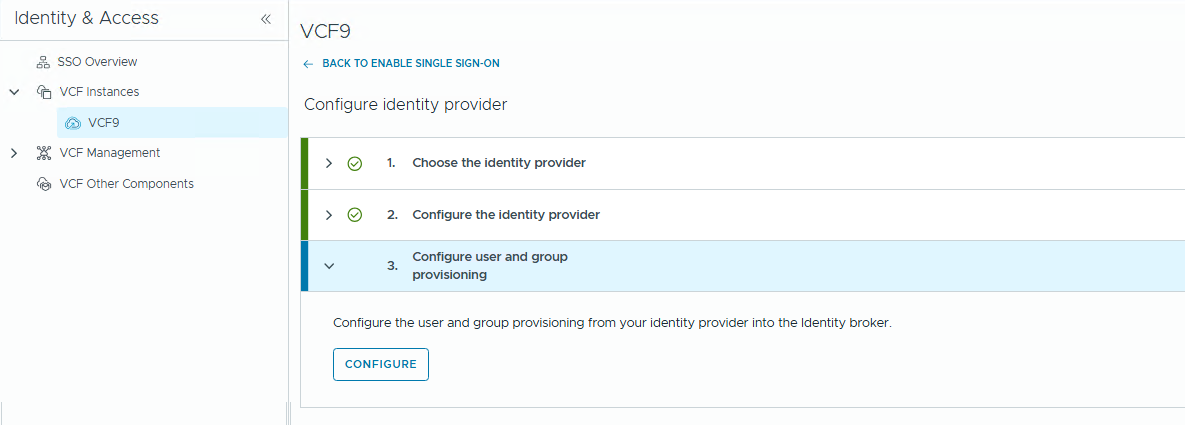
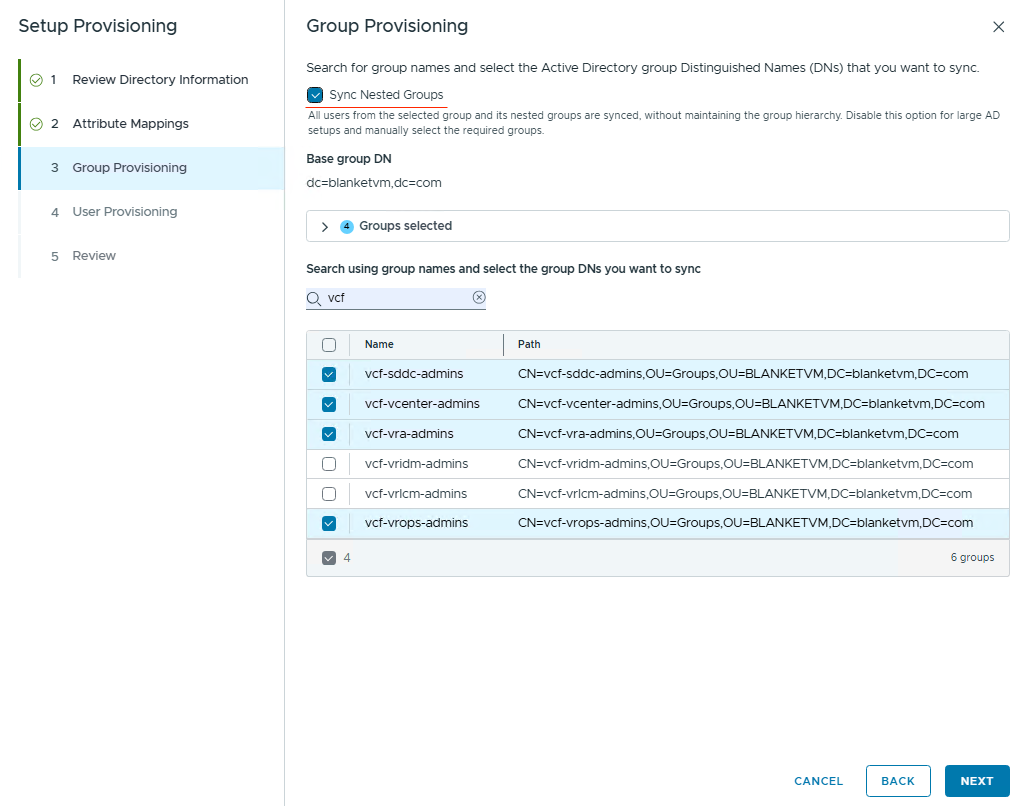
- Configure users and groups synchronization.
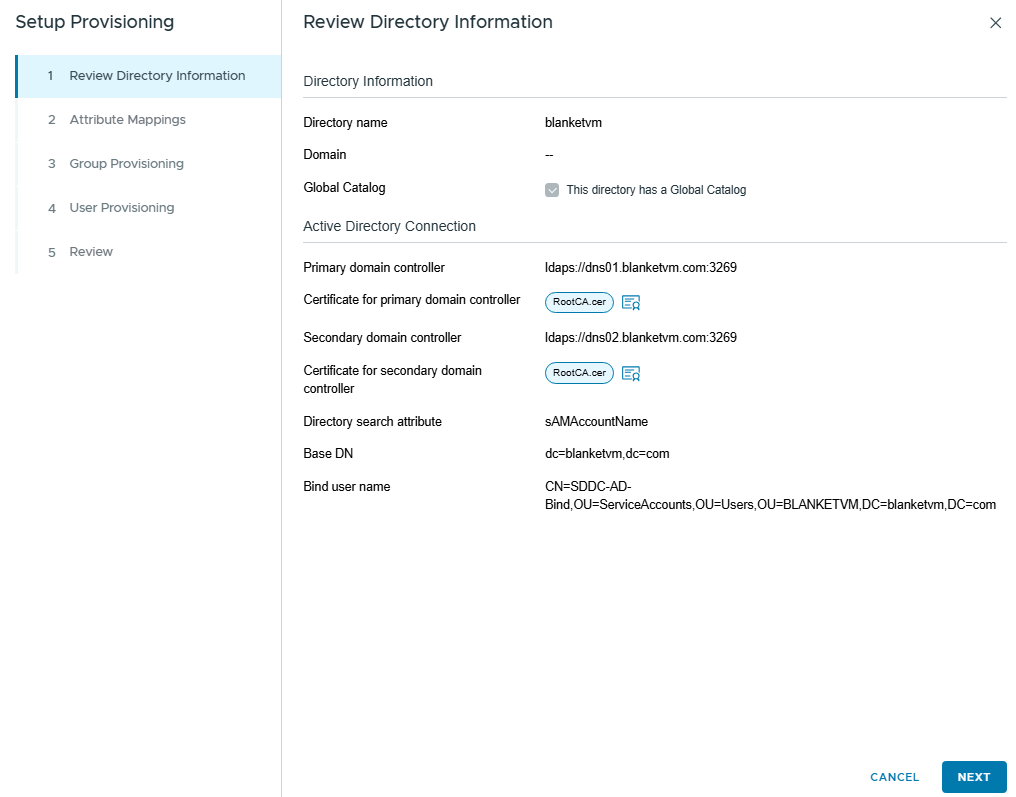
Review and click Next. On the next page, configure Attribute Mappings.
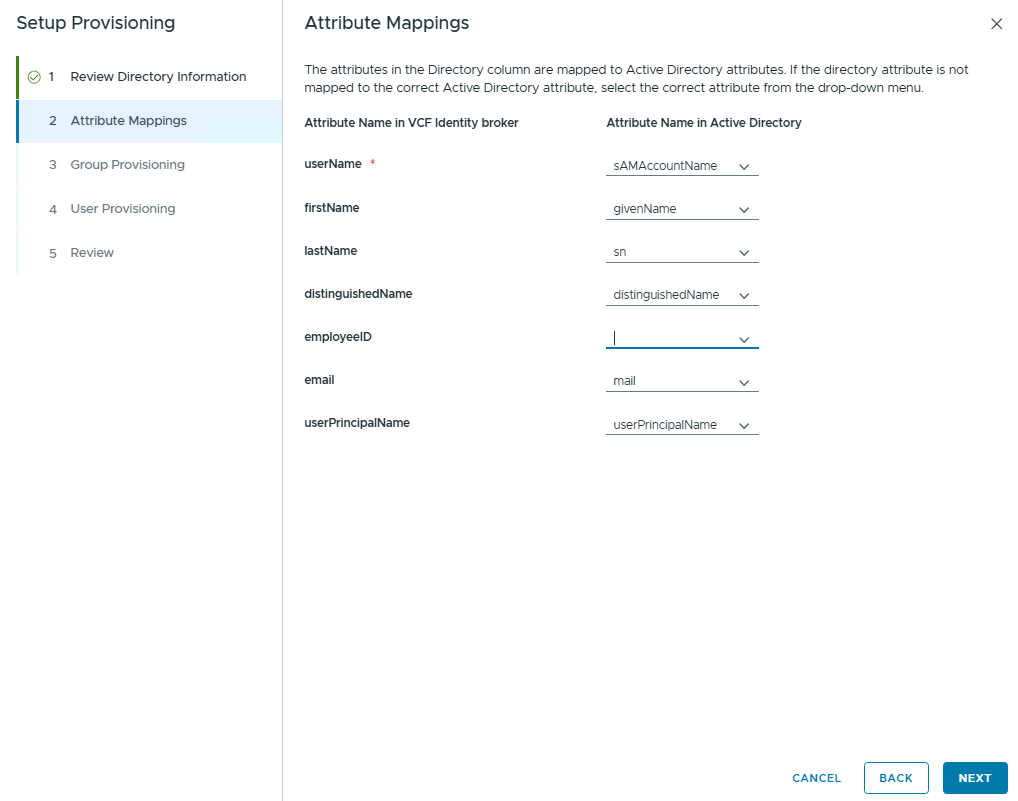
Click Next and configure group synchronization. Select Sync Nested Group if you need.
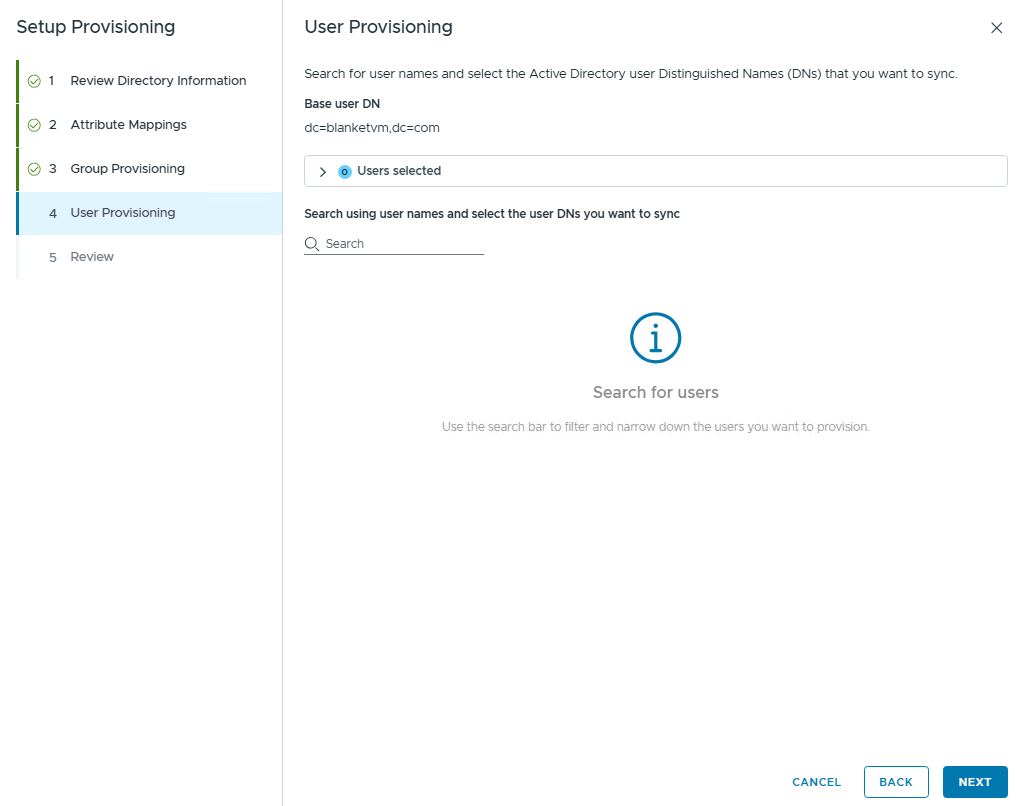
Click Next and configure user synchronization. I will assign permissions through the groups, so here I have no users to sync.
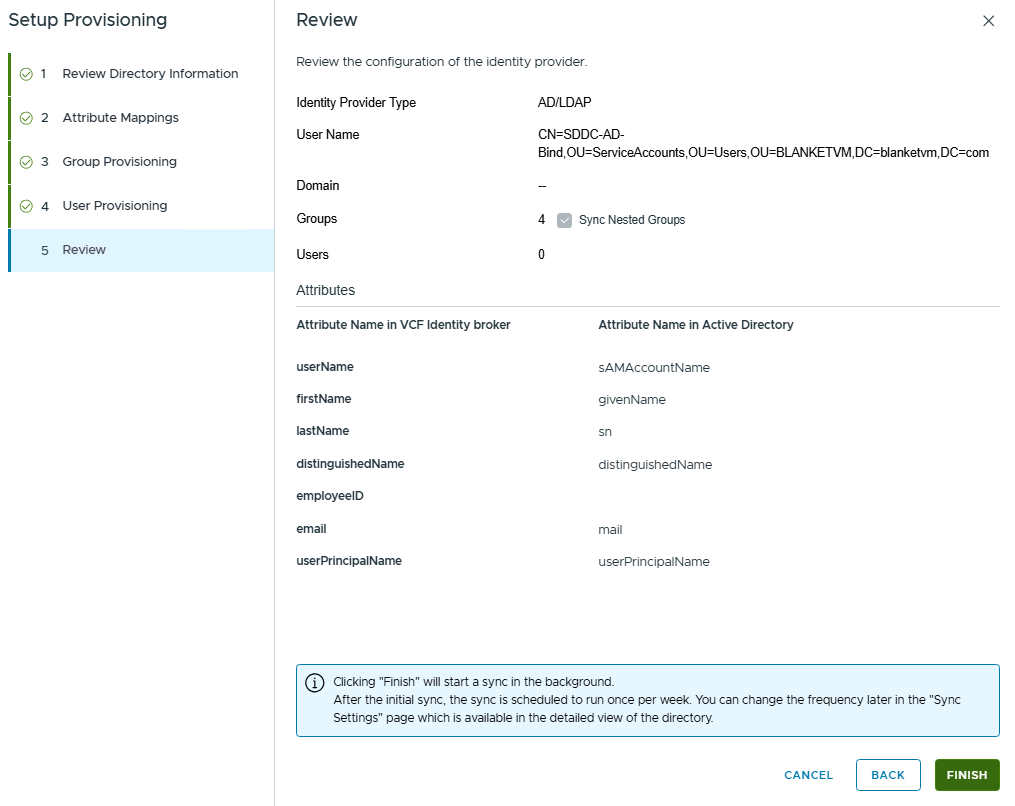
Review and Finish.
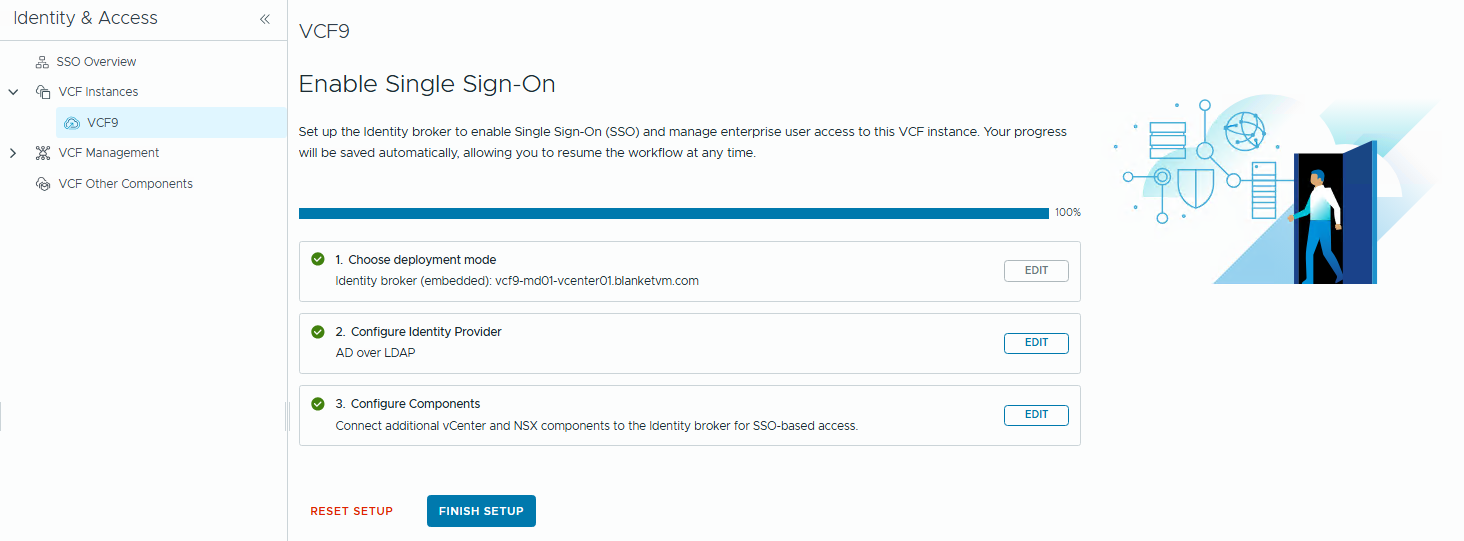
- When the configuration is finished, click the
Donebutton.

And Finish Setup.
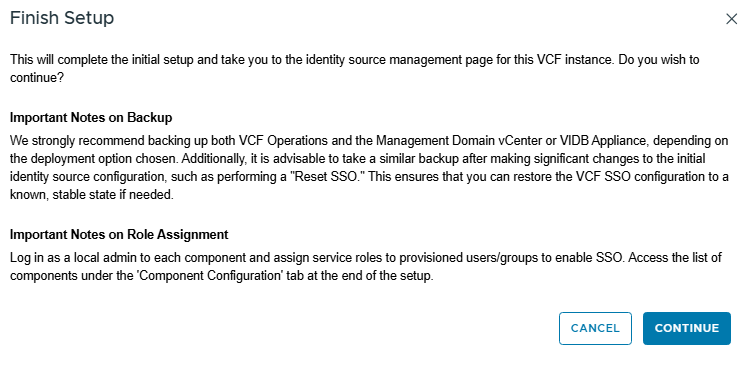
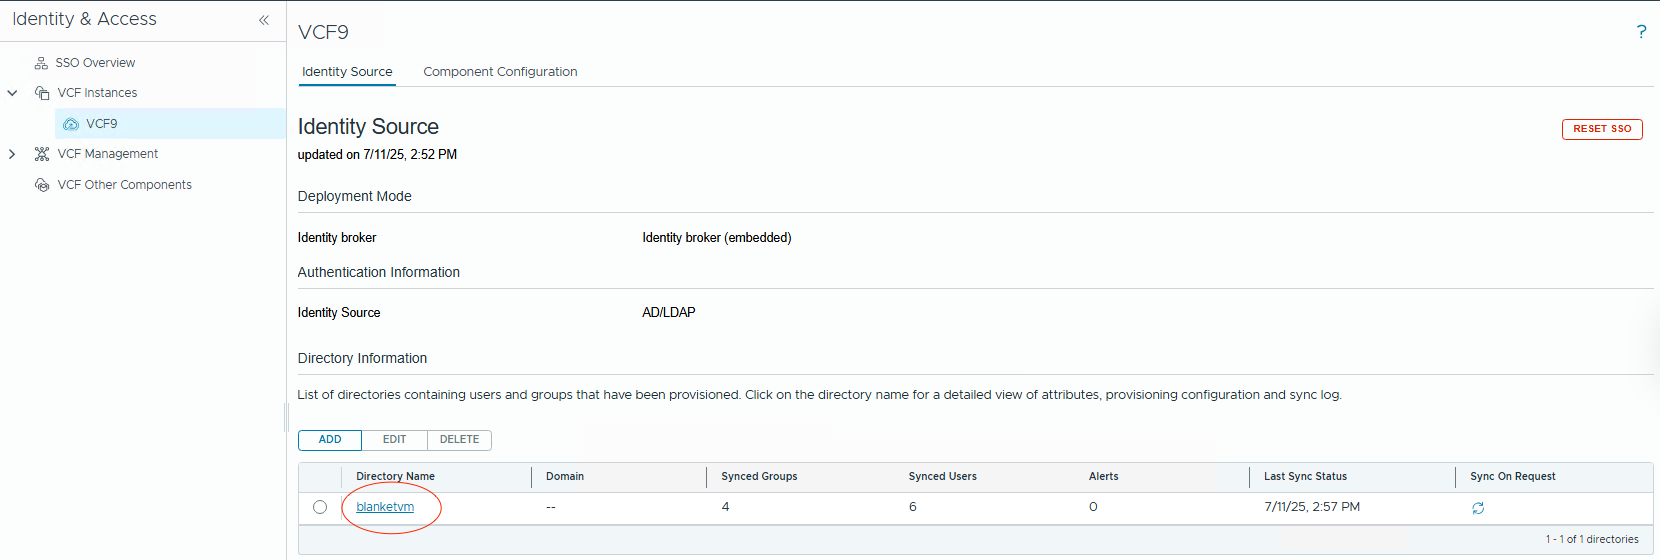
- Now, when Identity Broker is set up, we need to check the
Sync Statusand changeSynchronization Frequency.
Click on the directory name, go toSync Settings, andedit.
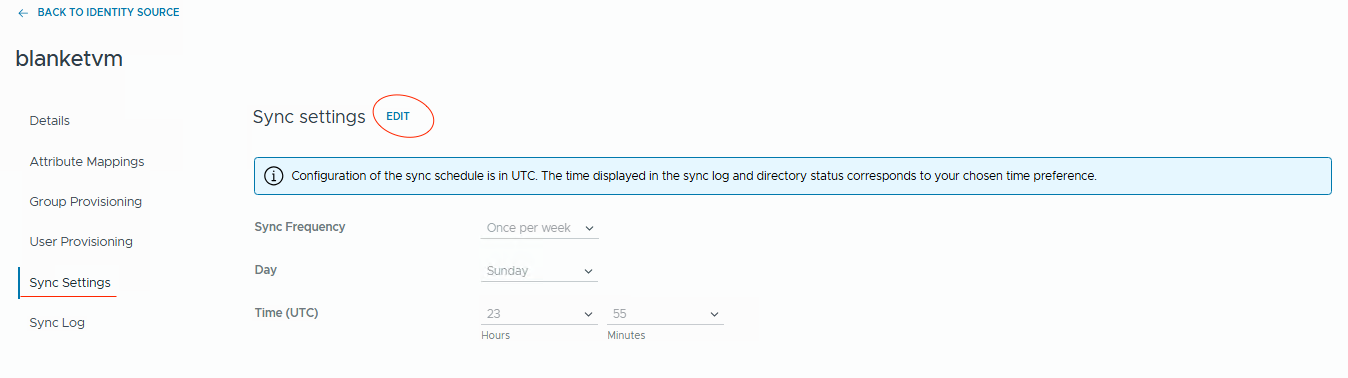
- Change the Frequency to the value that you want. I prefer synchronization every 15 minutes.
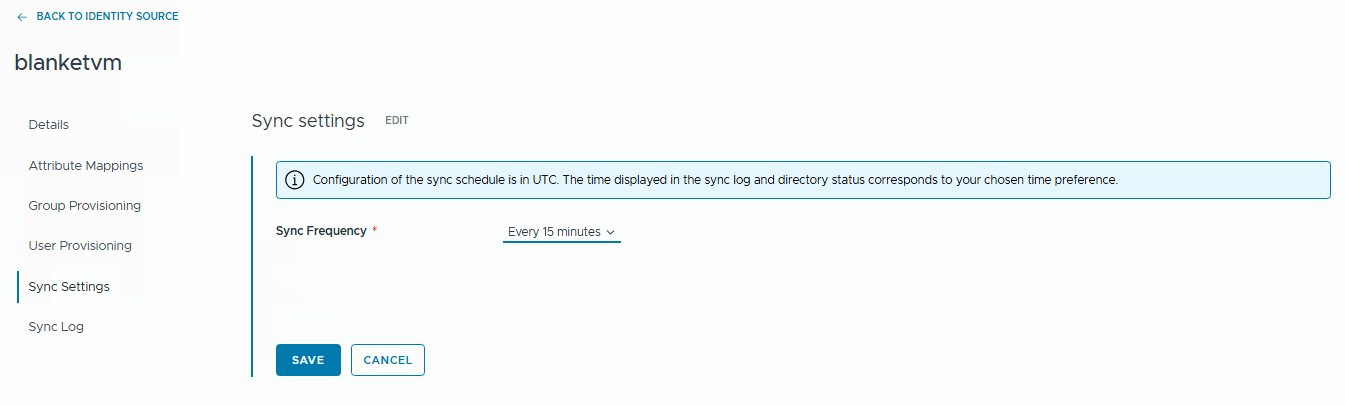
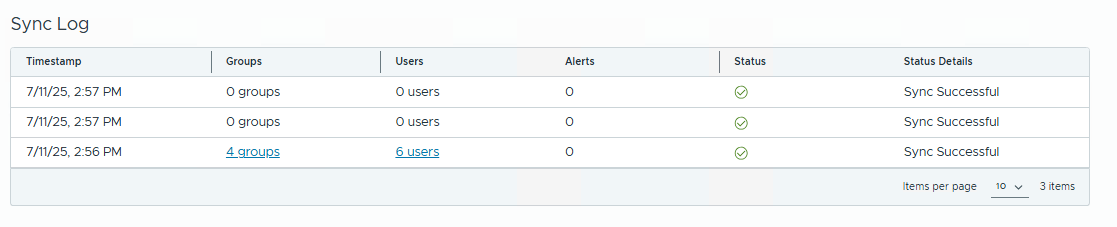
- Go to
Sync Logand confirm that synchronization works fine.
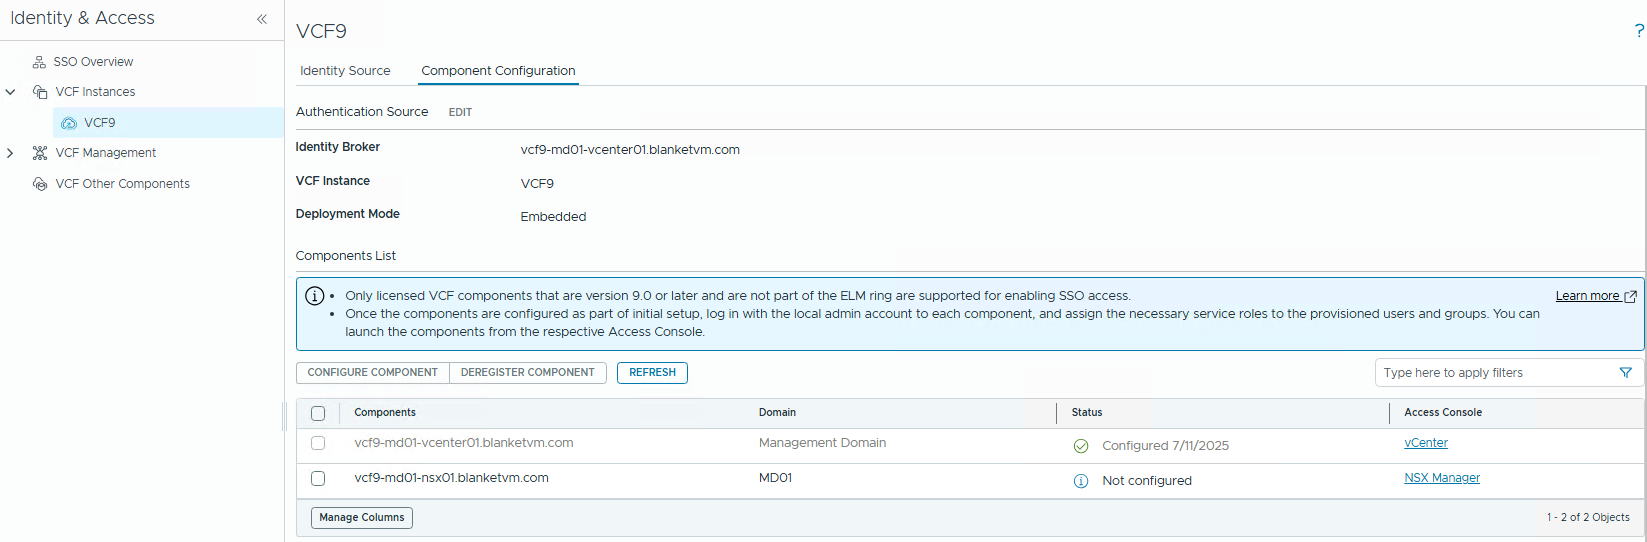
- Change the tab to Component Configuration, and you will see that vCenter is automatically configured. Note that VCF Operations, Automation, and other components require additional configuration (will be covered by the following posts).
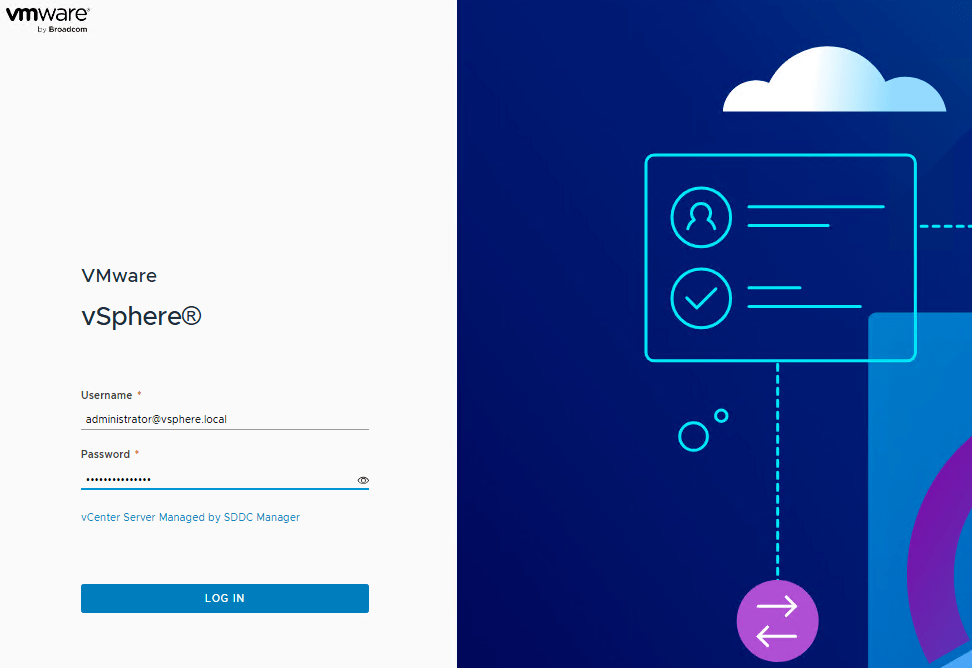
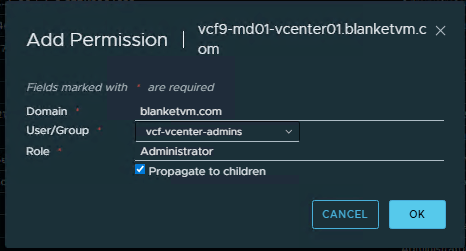
- Go to vCenter and configure permissions for an AD Group. Log in using the
administrator@vsphere.localaccount.
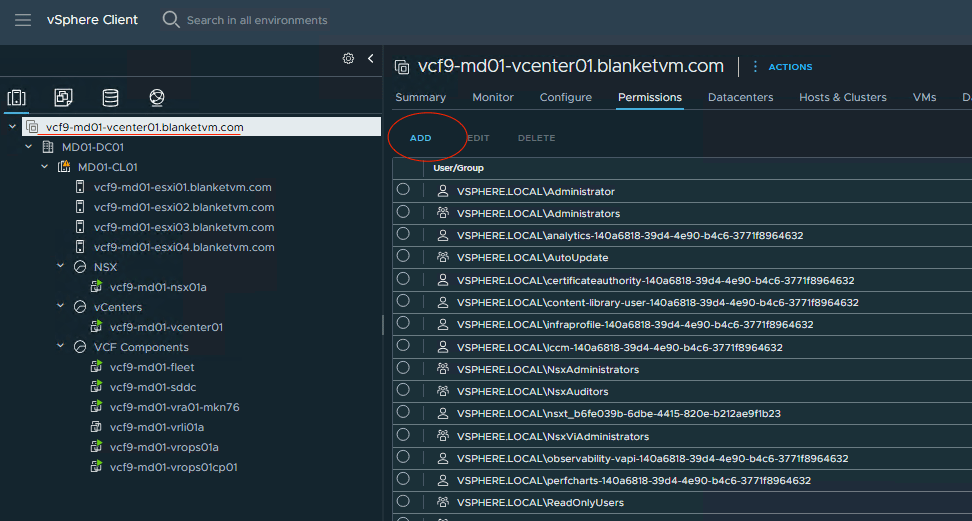
You should see the configured domain in the drop-down list.
- Log out and log in once again to the vCenter. You should be able to use VCF SSO to log in.

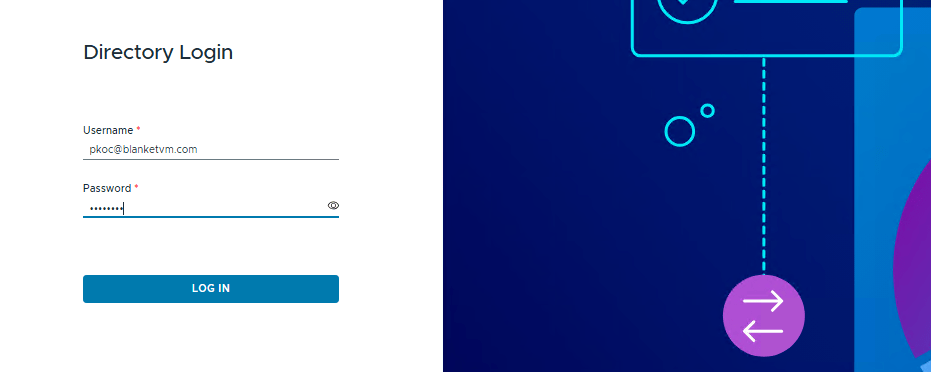
Success!
VCF 9 Network topology and IP addresses:
Subnets were mentioned in the first VCF 9 post, but here’s a reminder of what they look like (picture will be expanded in the following posts).

All the FQDNs mentioned below must exist in your DNS before you deploy VCF.
| Component | IP ADDRESS | FQDN | Description |
|---|---|---|---|
| VCF Operations | 10.250.20.51 | vcf9-md01-vrops01a.blanketvm.com | VCF Operations Analytics node. |
| VCF Operations Collector | 10.250.20.55 | vcf9-md01-fleet.blanketvm.com | VCF Operations collector. |
| Fleet Management | 10.250.20.10 | vcf9-md01-vrops01cp01.blanketvm.com | Fleet Management. |
| VCF Automation VIP | 10.250.20.100 | vcf9-md01-vra01.blanketvm.com | VCF Automation. |
| VCF Automation Node IP1 | 10.250.20.101 | – | VCF Automation Node IP. |
| VCF Automation Node IP2 | 10.250.20.102 | – | VCF Automation Node IP for failover. |
| vCenter Server | 10.250.20.1 | vcf9-md01-vcenter01.blanketvm.com | vCenter MGMT. |
| NSX Manager VIP | 10.250.20.30 | vcf9-md01-nsx01.blanketvm.com | NSX Cluster VIP. |
| NSX Manager Node IP | 10.250.20.31 | vcf9-md01-nsx01a.blanketvm.com | NSX Manager first node. |
| SDDC Manager | 10.250.20.11 | vcf9-md01-sddc.blanketvm.com | SDDC Manager. |
| VCF Operations for Logs Node | 10.250.20.71 | vcf9-md01-vrli01a.blanketvm.com | VCF Operations for Logs Node 1 |
| VCF Operations for Logs VIP | 10.250.20.70 | vcf9-md01-vrli01.blanketvm.com | VCF Operations for Logs ILB IP1 |
Conclusion:
Configuring Single Sign-On in VCF 9 using the Identity Broker and integrating it with vCenter is a foundational step toward achieving a secure and unified authentication experience across your VMware Cloud Foundation environment.
In the next part of our VCF 9 deployment series, we’ll integrate other components and continue building out a robust and enterprise-ready private cloud platform.
Stay tuned!

6 thoughts on “VCF 9 Deployment PART4: VCF Single Sign-On configuration (Identity Broker and vCenter).”