
Introduction:
Welcome to the third part of the VCF 9 Deployment series. After completing the bring-up of the management domain in the previous post, it’s time to enhance observability and operational insight across your VMware Cloud Foundation environment.
In this post, we’ll walk through the deployment of VCF Operations for Logs (formerly Aria Operations for Logs), which is a key component for centralized log collection, analysis, and troubleshooting in VCF.
If you didn’t see previous posts, go to:
VCF 9 Deployment PART1: Topology, ESX Host Preparation and VCF Installer deployment
VCF 9 Deployment PART2: VCF deployment
Depot configuration:
- Log in to the VCF Operations that was deployed in the second part using the user:
admin. In my case, it is
https://vcf9-md01-vrops01a.blanketvm.com.
- Expand
Fleet Management,and go to theLifecycle -> VCF Management -> Depot Configurationand configure the connection to the Depot using the Download Token.
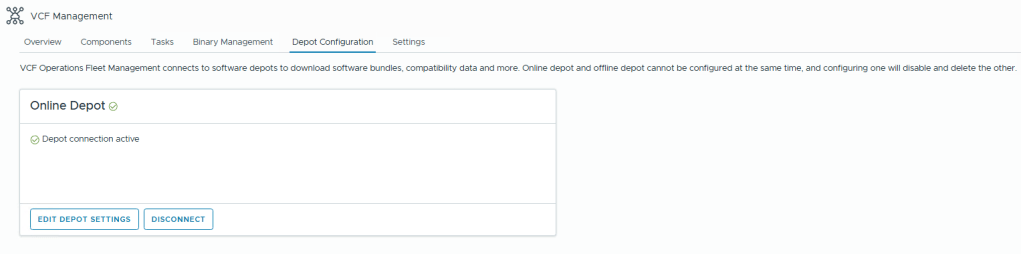
- Switch tab to
Binary Managementand download the operations-logs binaries.

VCF Operations for Logs deployment:
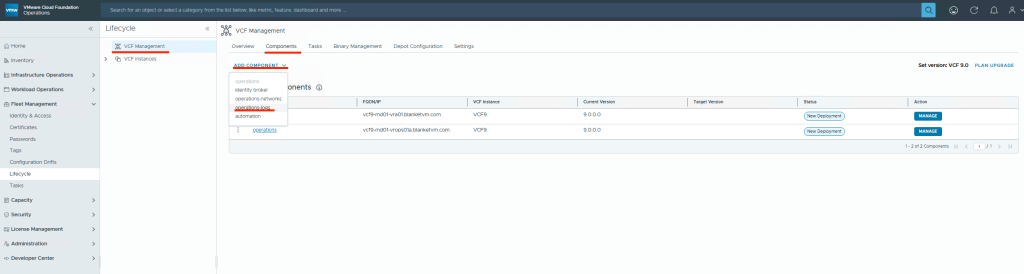
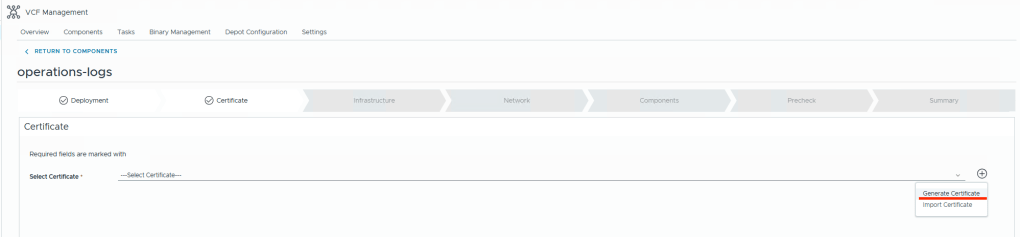
- To deploy a new instance of VCF Operations for Logs, go to
Fleet Management -> Lifecycle -> VCF Management -> Components -> Add Components -> operations-logs
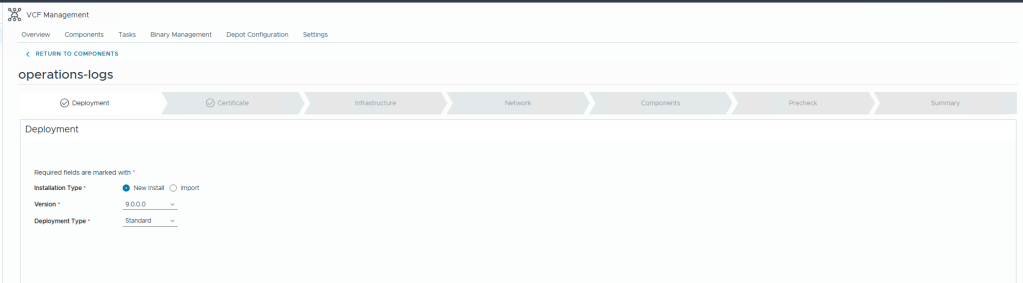
- In the new deployment wizard, select New Installation and Deployment Type.
In my case, I will use a simple deployment to minimize resource usage.
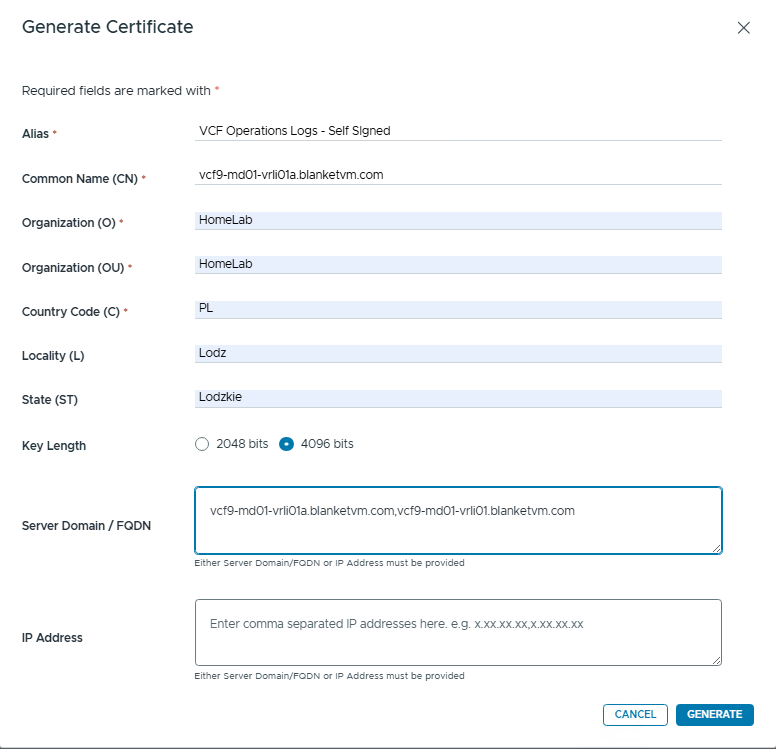
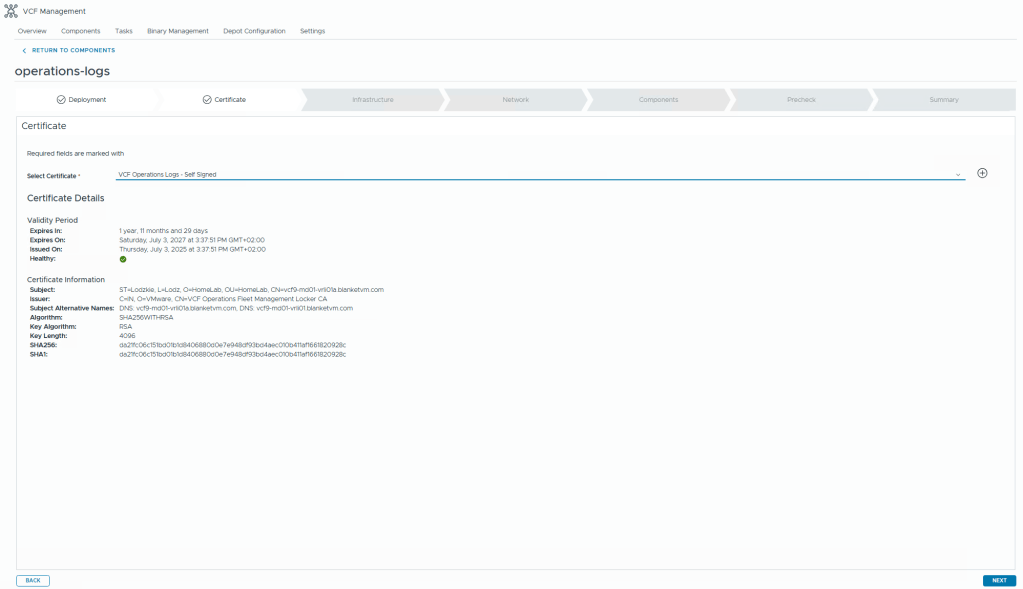
- In the next step, we must select a certificate. You can import a CA-signed certificate or generate a self-signed certificate. I will use a self-signed certificate while deploying the solution and change it to a CA-signed certificate in future posts.
Alias: It’s the name of a certificate that will be used to locate the certificate.
Common Name (CN): The fully qualified domain name (FQDN) for which the certificate is issued.
Organization (O): The legal name of the company or entity requesting the certificate.
Organizational Unit (OU): The department or team within the organization (e.g. IT, Infrastructure).
Key Length: Size of the cryptographic key (e.g. 2048 or 4096 bits); higher = more secure.
Server Domain/FQDN and IP Address: Those fields will be used in the SAN (Subject Alternative Name) attribute. Additional DNS names or IPs for which the certificate should be valid. Use all nodes’ FQDNs and ILB VIP IPs here.
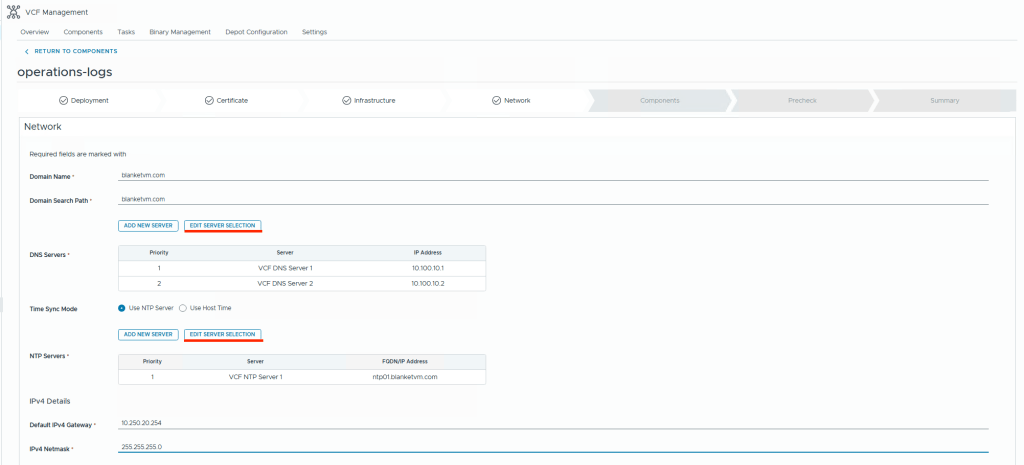
- In the next two steps, we must select the virtual machine location and the basic OS configuration.
Click on Edit Server Selection to select DNS and NTP Servers from the list.

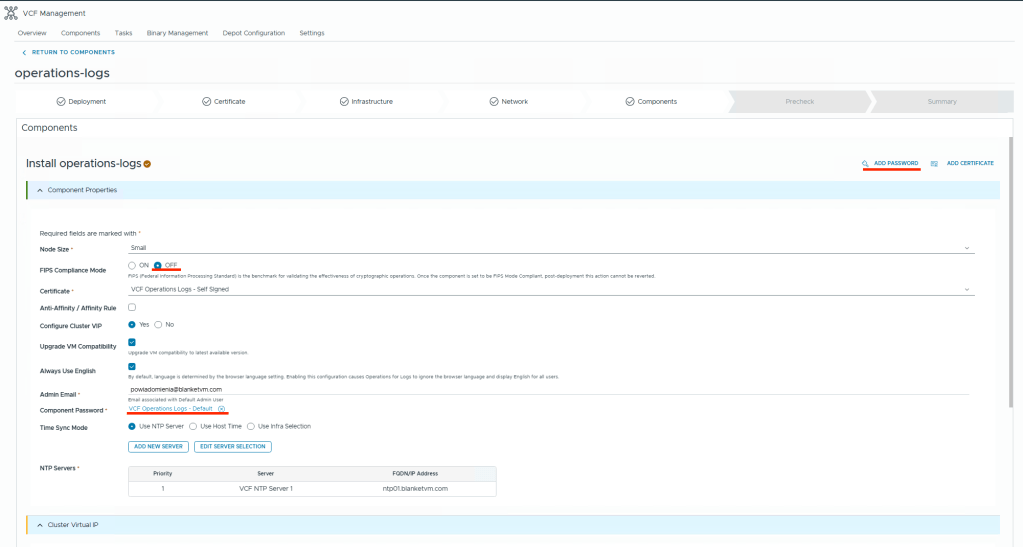
- On the Components tab, configure VCF Operations nodes.
The first step is to add a default password to the store for VCF Operations for Logs. To do this, click"Add Password"in the top right corner.
Then you must decide about:
Node Size: Small (enough for lab purposes). For production use sizer:
https://vrlisizer.vmware.com/overview
FIPS Mode: FIPS Mode refers to a system configuration that enforces compliance with the Federal Information Processing Standards.
Anti-Affinity/Affinity Rule: This will automatically create DRS rules in the vCenter. It makes sense if you have a cluster deployment.
Configure Cluster VIP: The Cluster VIP is a single virtual IP address that clients and external systems (like vCenter, NSX, or Aria Operations) use to access the entire Aria Operations for Logs cluster. It acts as an integrated load-balanced entry point to the cluster.
Upgrade VM Compatibility: Check if you want to use the latest VM Hardware version.
Always use English: By default, the language is determined by the browser language setting.
Password: Select the password that you previously created.
Time sync mode: Select NTP Servers.
Cluster Virtual IP: FQDN and IP for Integrated Load Balancer.
Components: VM name, FQDN, and IP Addresses for components.

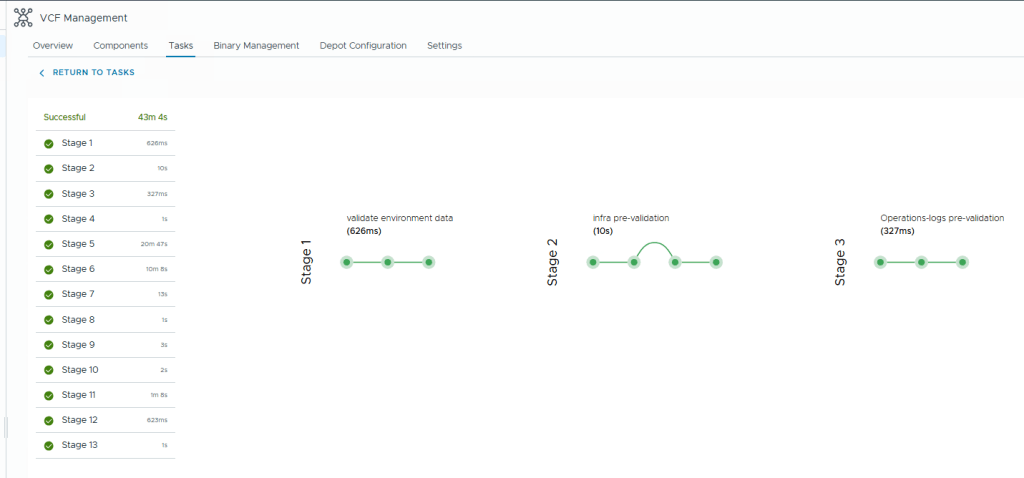
- Run precheck and deploy the solution.

- Wait until deployment ends.
- Go to
Administration -> Control Panel -> Log Managementand log in to VCF Operations for Logs Console using theadminuser.


VCF 9 Network topology and IP addresses:
Subnets were mentioned in the first VCF 9 post, but here’s a reminder of what they look like (picture will be expanded in the following posts).

All the FQDNs mentioned below must exist in your DNS before you deploy VCF.
| Component | IP ADDRESS | FQDN | Description |
|---|---|---|---|
| VCF Operations | 10.250.20.51 | vcf9-md01-vrops01a.blanketvm.com | VCF Operations Analytics node. |
| VCF Operations Collector | 10.250.20.55 | vcf9-md01-fleet.blanketvm.com | VCF Operations collector. |
| Fleet Management | 10.250.20.10 | vcf9-md01-vrops01cp01.blanketvm.com | Fleet Management. |
| VCF Automation VIP | 10.250.20.100 | vcf9-md01-vra01.blanketvm.com | VCF Automation. |
| VCF Automation Node IP1 | 10.250.20.101 | – | VCF Automation Node IP. |
| VCF Automation Node IP2 | 10.250.20.102 | – | VCF Automation Node IP for failover. |
| vCenter Server | 10.250.20.1 | vcf9-md01-vcenter01.blanketvm.com | vCenter MGMT. |
| NSX Manager VIP | 10.250.20.30 | vcf9-md01-nsx01.blanketvm.com | NSX Cluster VIP. |
| NSX Manager Node IP | 10.250.20.31 | vcf9-md01-nsx01a.blanketvm.com | NSX Manager first node. |
| SDDC Manager | 10.250.20.11 | vcf9-md01-sddc.blanketvm.com | SDDC Manager. |
| VCF Operations for Logs Node | 10.250.20.71 | vcf9-md01-vrli01a.blanketvm.com | VCF Operations for Logs Node 1 |
| VCF Operations for Logs VIP | 10.250.20.70 | vcf9-md01-vrli01.blanketvm.com | VCF Operations for Logs ILB IP1 |
Conclusion:
In this post, we walked through the deployment of VMware VCF Operations for Logs as part of a VCF 9 environment. The integrations and the rest of the configuration will be covered by the next blog posts.
Stay tuned!

7 thoughts on “VCF 9 Deployment PART3: VCF Operation for Logs deployment.”