
Introduction:
Welcome to the first post in my new blog series on VMware Cloud Foundation (VCF) 9 Deployment. In this multi-part guide, I’ll walk you step by step through the full installation process of VCF 9 – from initial planning and environment preparation to a fully functional private cloud stack built on VMware’s latest platform.
In Part 1, we’ll focus on three foundational elements:
– Understanding the design of my lab VCF topology.
– Preparing ESX hosts for the bringup process.
– Deploying the VCF Installer.
Let’s get started with building a solid foundation for your VMware Cloud Foundation!
ESX Host Configuration:
VCF 9 requires at least 3 ESX Hosts for the Management Domain. I am going to configure vSAN for the Management Domain, so I will use 4 ESX Hosts to ensure High Availability. Each ESX Host has such a configuration:
Please note that the information below outlines my lab configuration. For production, please check the minimum hardware requirements and use supported configurations.
| Component | Configuration |
|---|---|
| CPU Sockets | 1 * |
| CPU Cores | 14 * |
| RAM | 128 GB |
| Local HDD (for ESX installation) | 128 GB SSD |
| vSAN Cache Drive | 200 GB SSD (will be expanded in the future) |
| vSAN Capacity Drive | 2x 300 GB SSD (will be expanded in the future) |
| Network Adapters | 6x network port 10Gb/s ** |
* VCF Automation requires more vCPUs (24) than you can run on such a configuration (I describe in the second post what is a workaround for that). That is my lab limitation, but it is recommended to use the supported count of CPU/Cores.
**The minimum number of network adapters is two. You can run all traffic on 2 VMNICs.
Deployment Components:
Due to a lack of resources, I use Simple deployment in my lab. The table will be updated with NSX Edges, etc., when I create posts with additional components.
| Component | vCPU | RAM [GB] | HDD [GB] |
|---|---|---|---|
| VCF Installer | 4 | 16 | 914 (thin: ~130 used) |
| SDDC Manager | 4 | 16 | 900 (thin: ~40 used) |
| vCenter MGMT Domain | 4 | 21 | 750 (thin: ~60 used) |
| vCenter Workload Domain | TBD | TBD | TBD |
| NSX Manager MGMT Domain | 6 | 24 | 300 (thin: ~30 used) |
| NSX Workload Domain | TBD | TBD | TBD |
| Fleet Management | 4 | 12 | 195 (thin: ~130 used) |
| VCF Operations | 4 | 16 | 274 (thin: ~50 used) |
| VCF Operations Collector | 4 | 16 | 264 (thin: ~40 used) |
| VCF Automation | 24 | 96 | |
| NSX Edges MGMT Domain | TBD | TBD | TBD |
| NSX Edges Workload Domain | TBD | TBD | TBD |
Architecture and Network Topology:
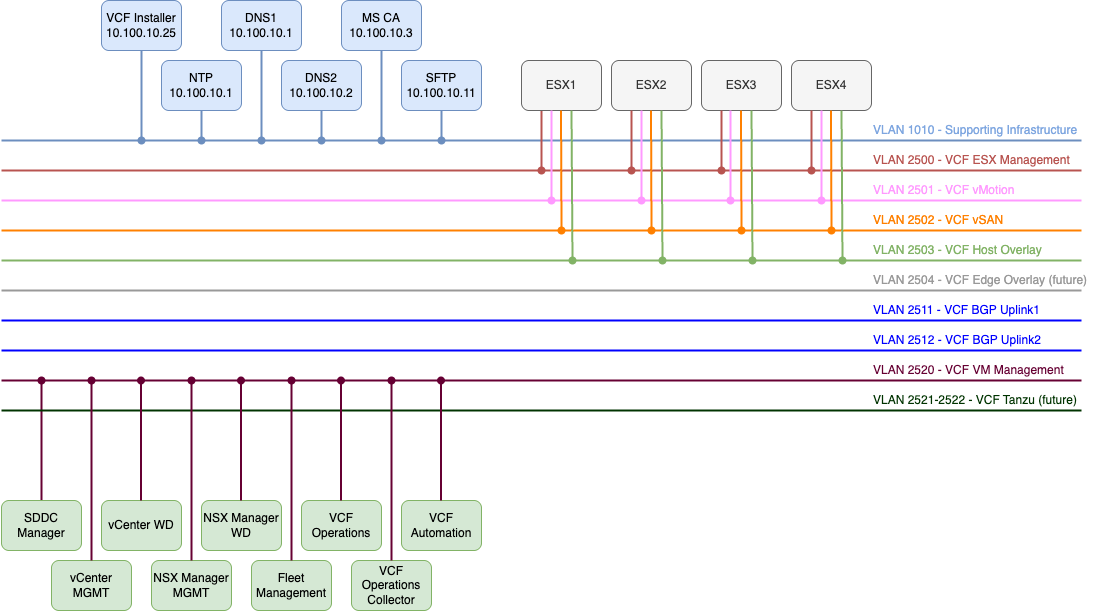
ESX Host Preparation:
To prepare ESX Hosts, you must do the following configuration:
1) Install the appropriate version of ESX. If your servers require a custom ISO file, you can create one using VMware PowerCLI or vSphere Lifecycle. The best way is to use an image prepared by the server vendor.
2) From DCUI, configure network adapter, ESX Management VLAN, IP address, subnet mask, gateway, DNS, FQDN for ESX, and DNS suffixes. (Typical steps that you need to do after the usual installation.)
3) Check if you have VM Network port group on all hosts and set VLAN ID on that port group.

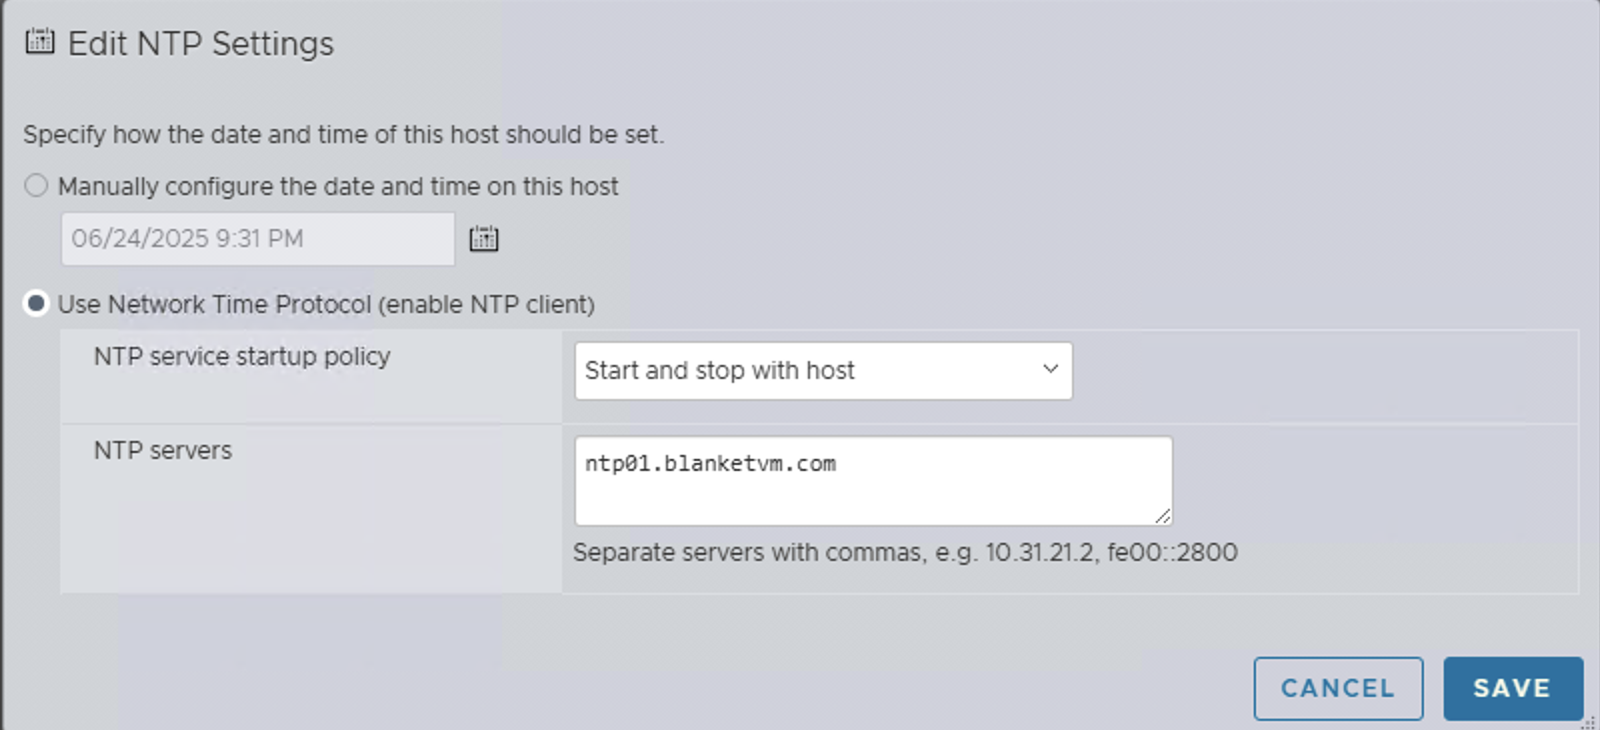
4) Configure the NTP Server and change the NTP service startup policy to Start and stop with host. If the service is not running, start it.
5) Regenerate the Self-Signed Certificate on ESX Hosts. To do that, you must enable SSH on the ESX host. Then log in using the root account and run the script:/sbin/generate-certificates
Then reboot ESX Host. Repeat that for all hosts.
VCF Installer deployment:
Before starting, make sure that you have:
– The static IP address and FQDN for the VCF Installer appliance.
– DNS entry for the appliance.
- Download VCF Installer (build required by VCF version) from the Broadcom Support Portal.
- Choose a place for VCF Installer deployment and use
Deploy a virtual machine from an OVF or OVA fileoption.
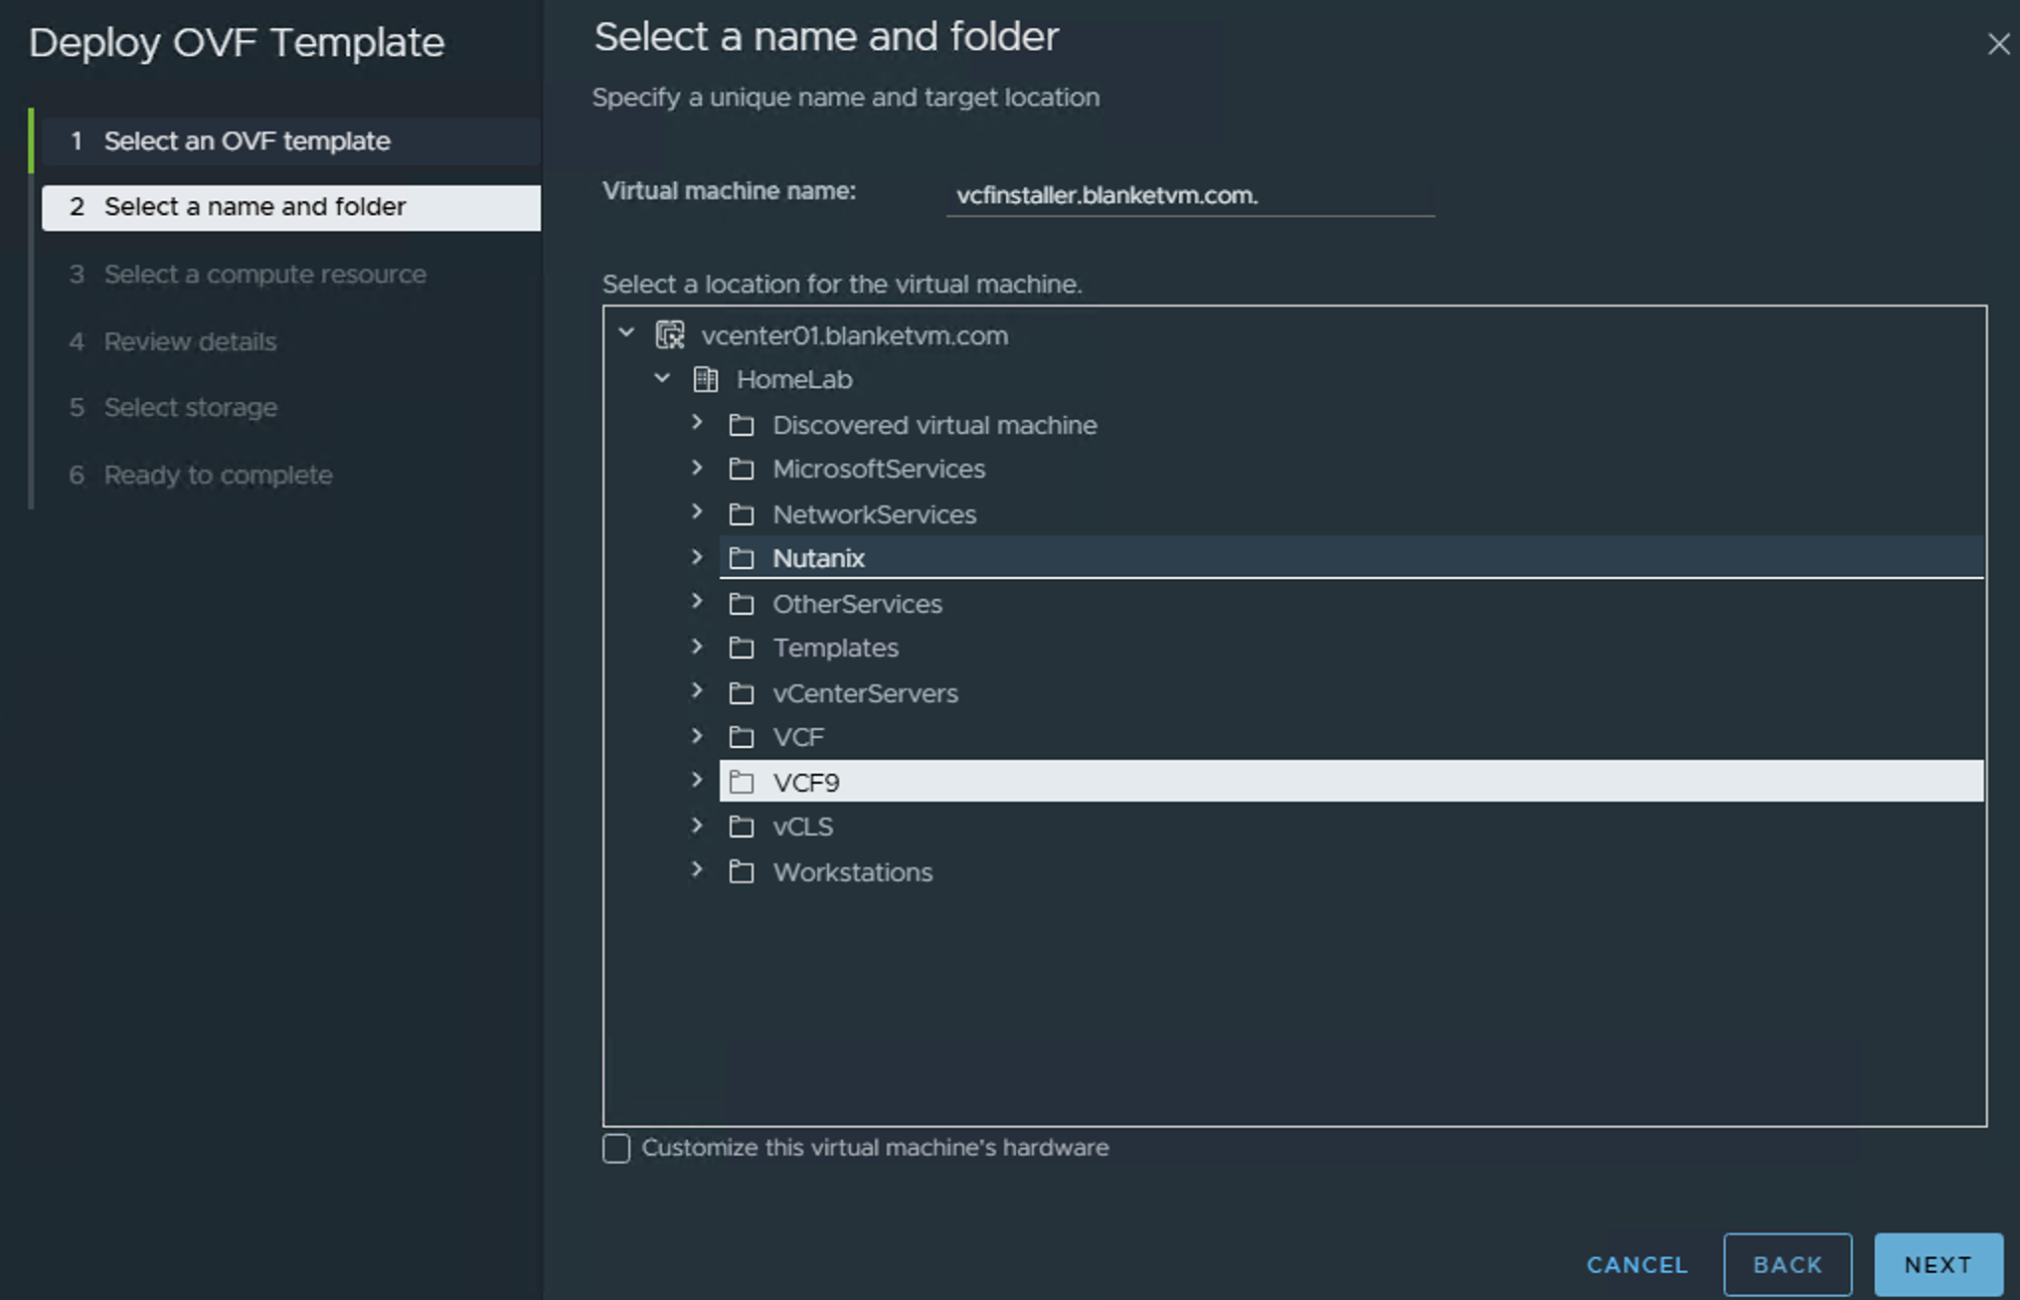
NOTE: VCF Installer can be deployed outside the Management Domain or on the first host that will form the management domain. - Select Name and Folder and click Next.
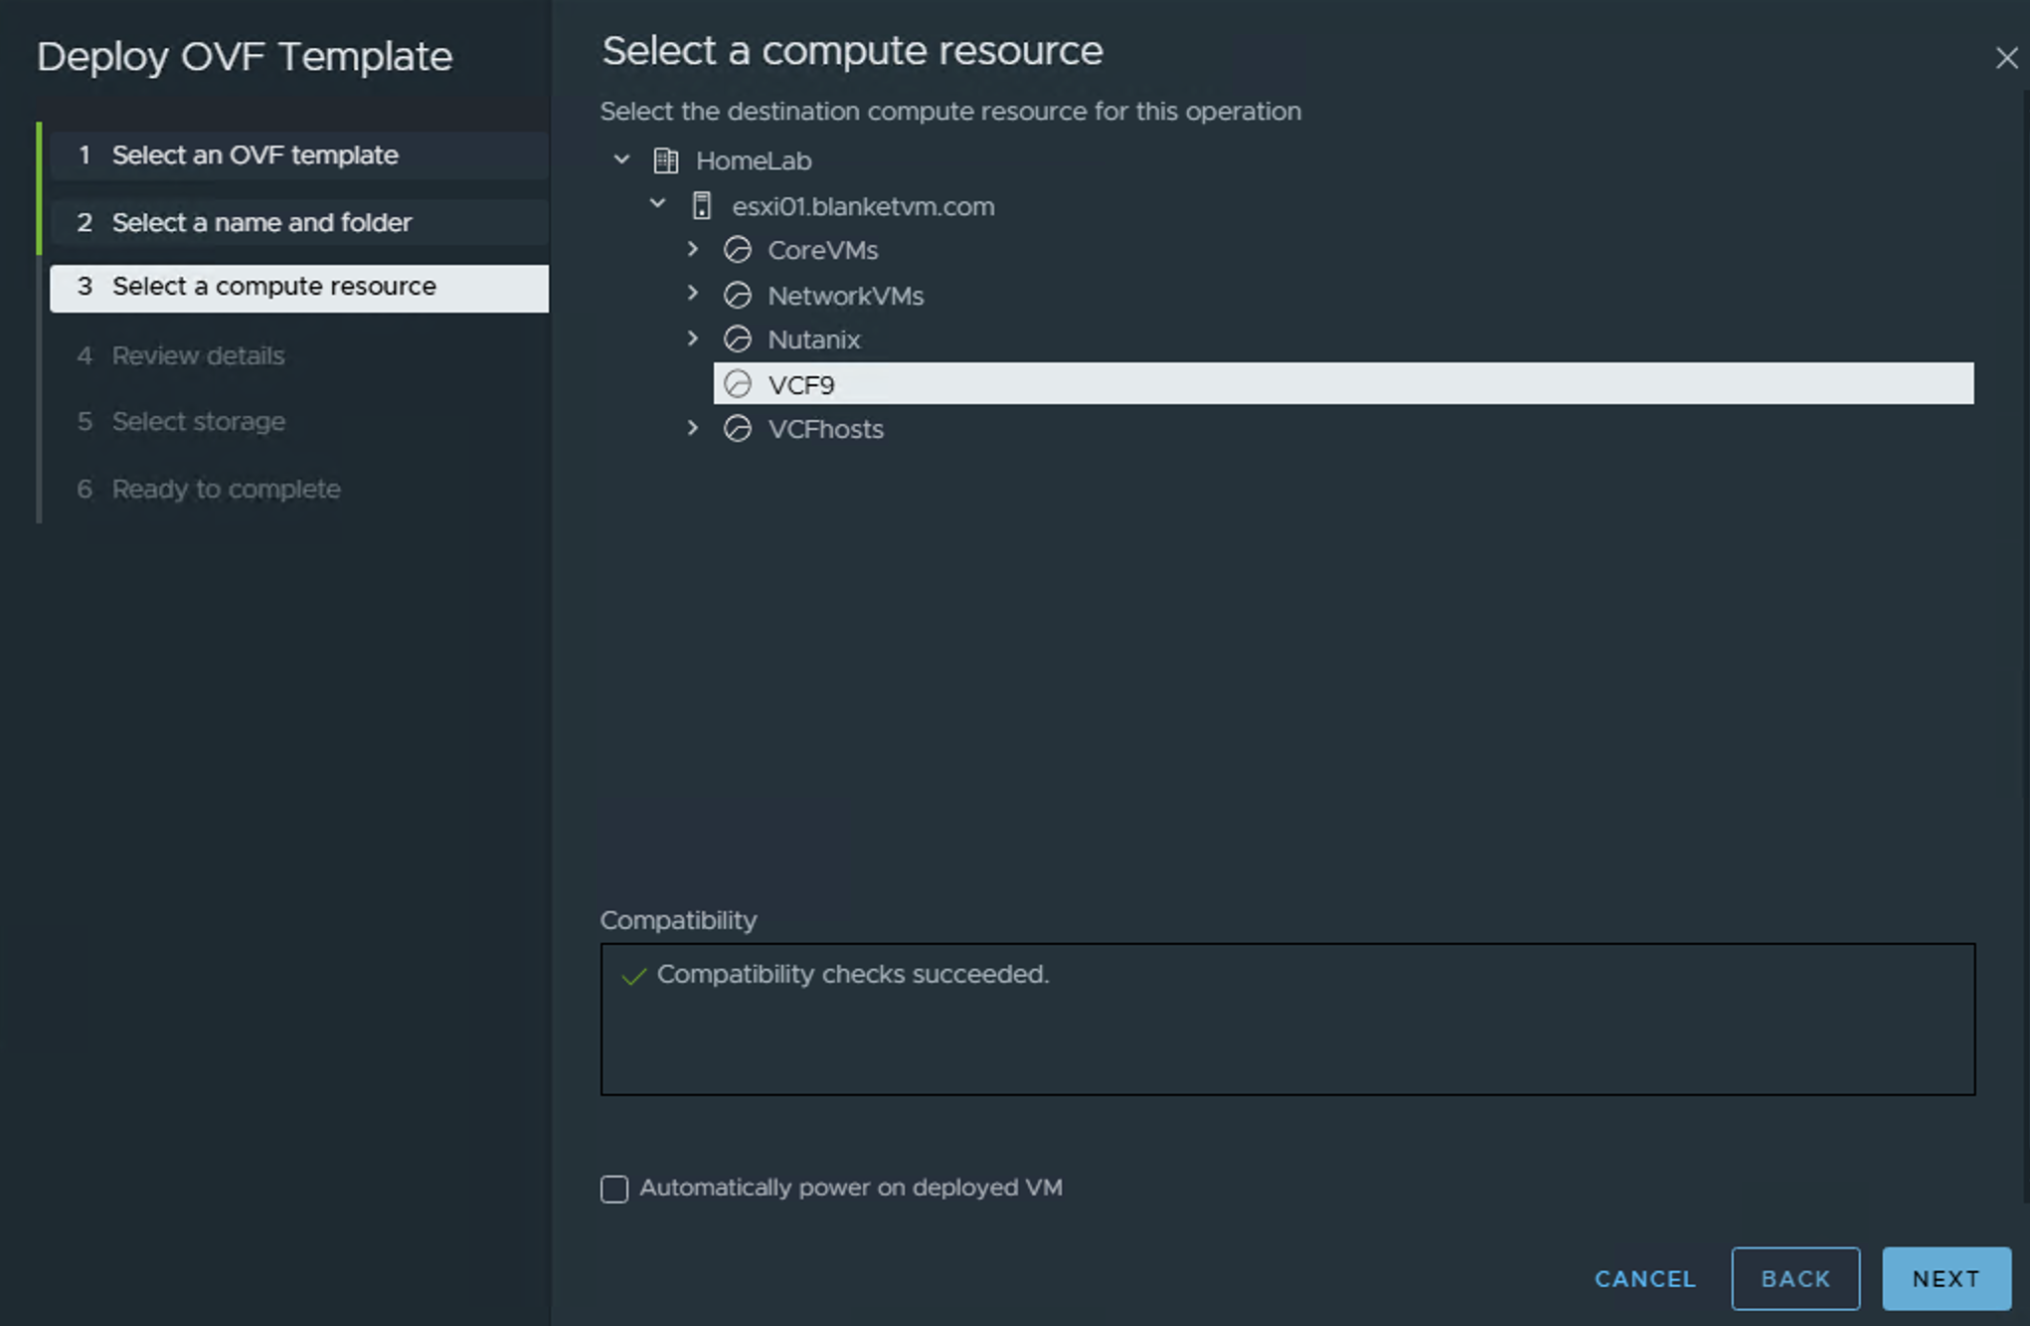
- Select Compute Resources and click Next.
- On Review Details, click Next and accept the License Agreement.
- Select Storage and click Next.

- Select Network and click Next.
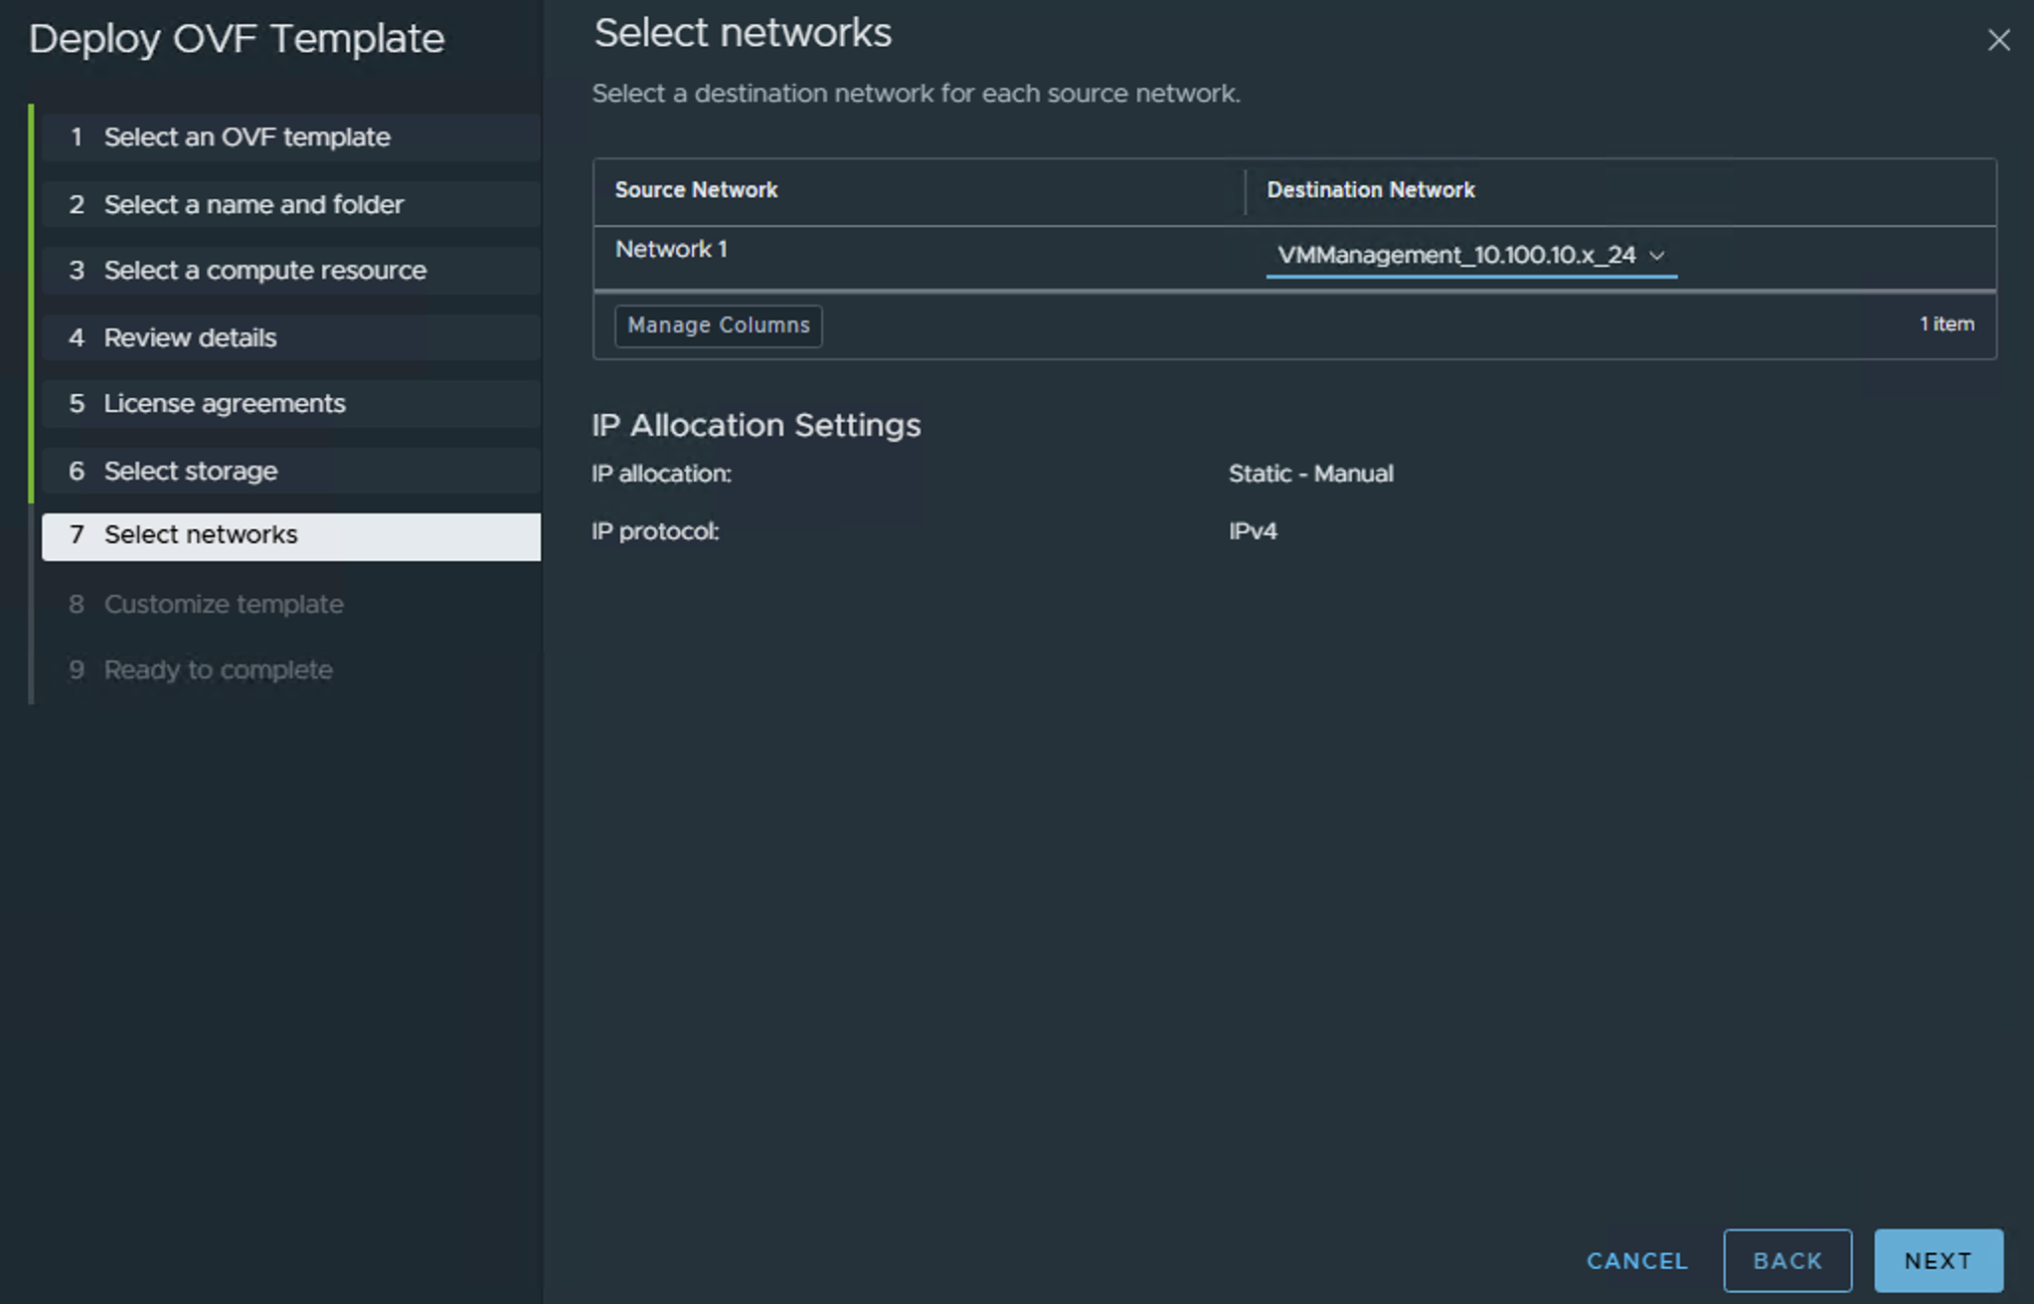
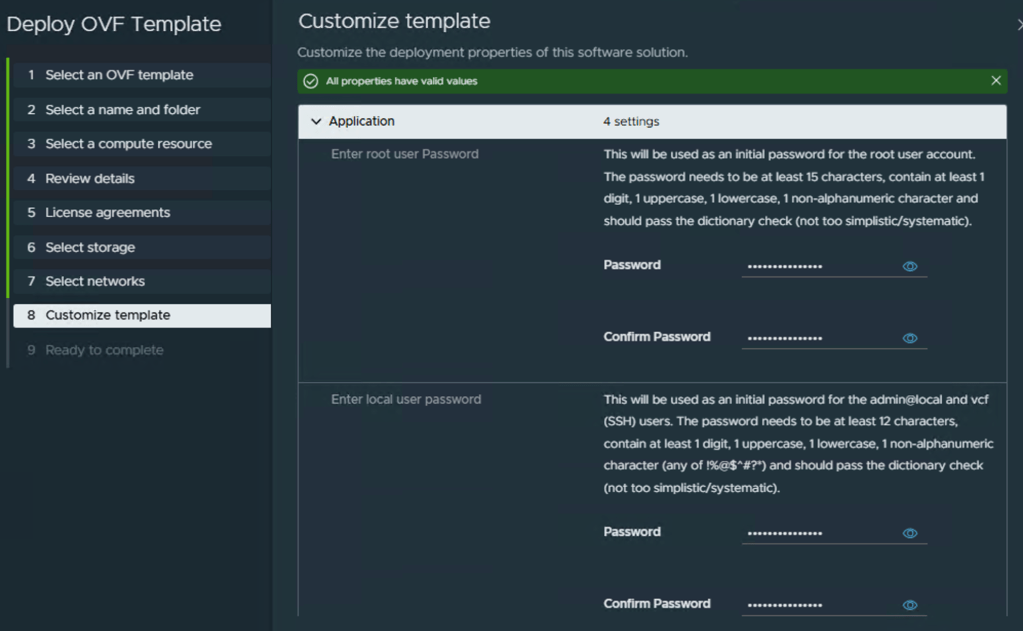
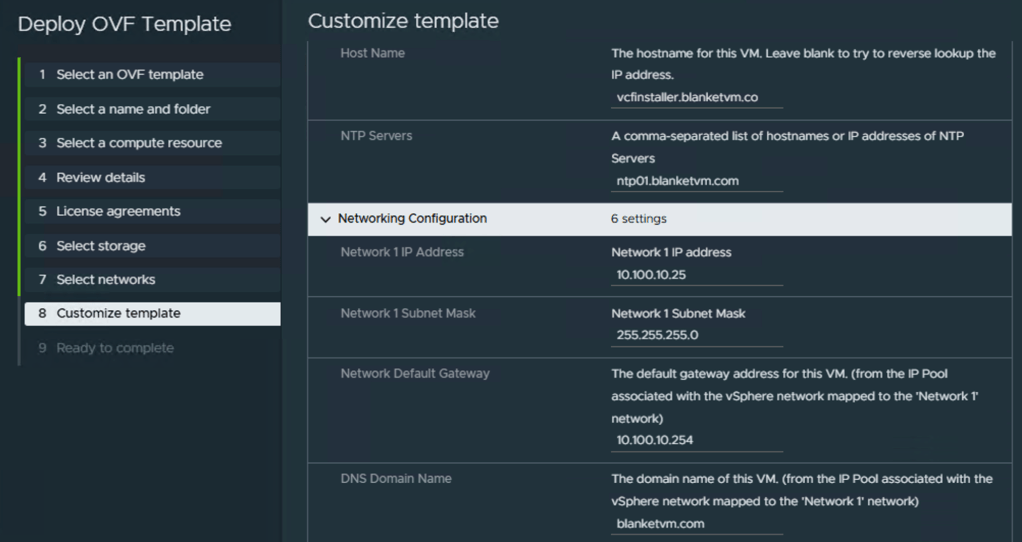
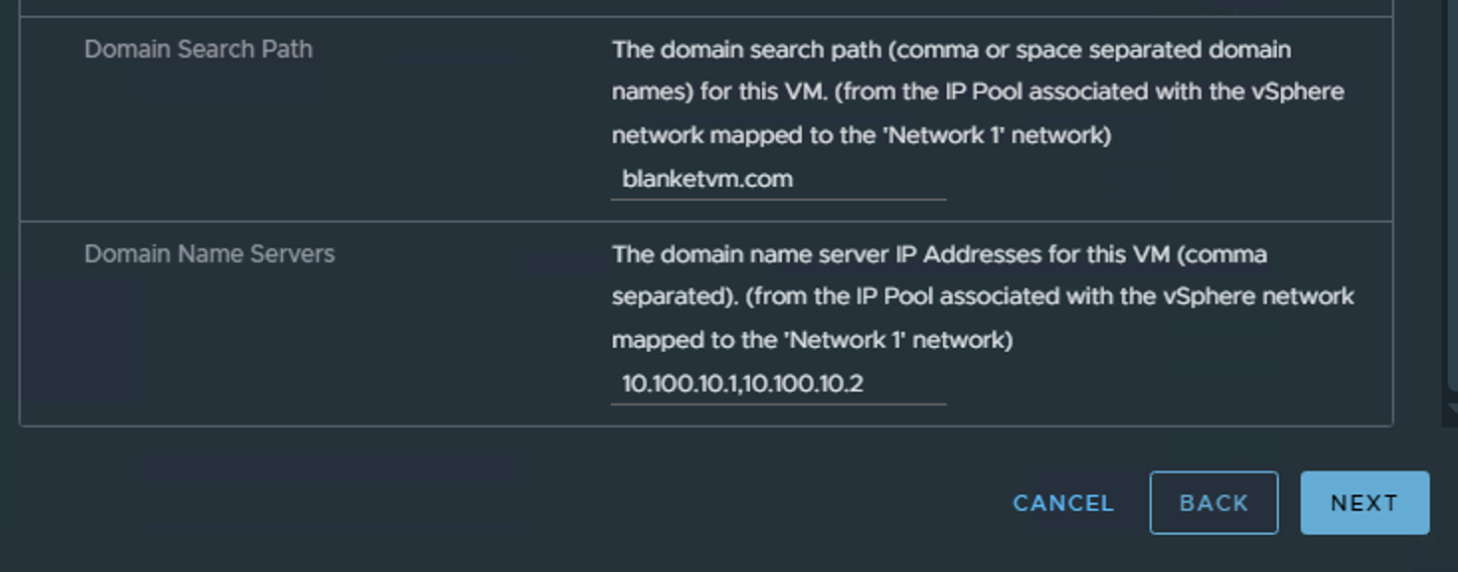
- Set passwords, network configuration, and NTP Server, then click Next and Finish.
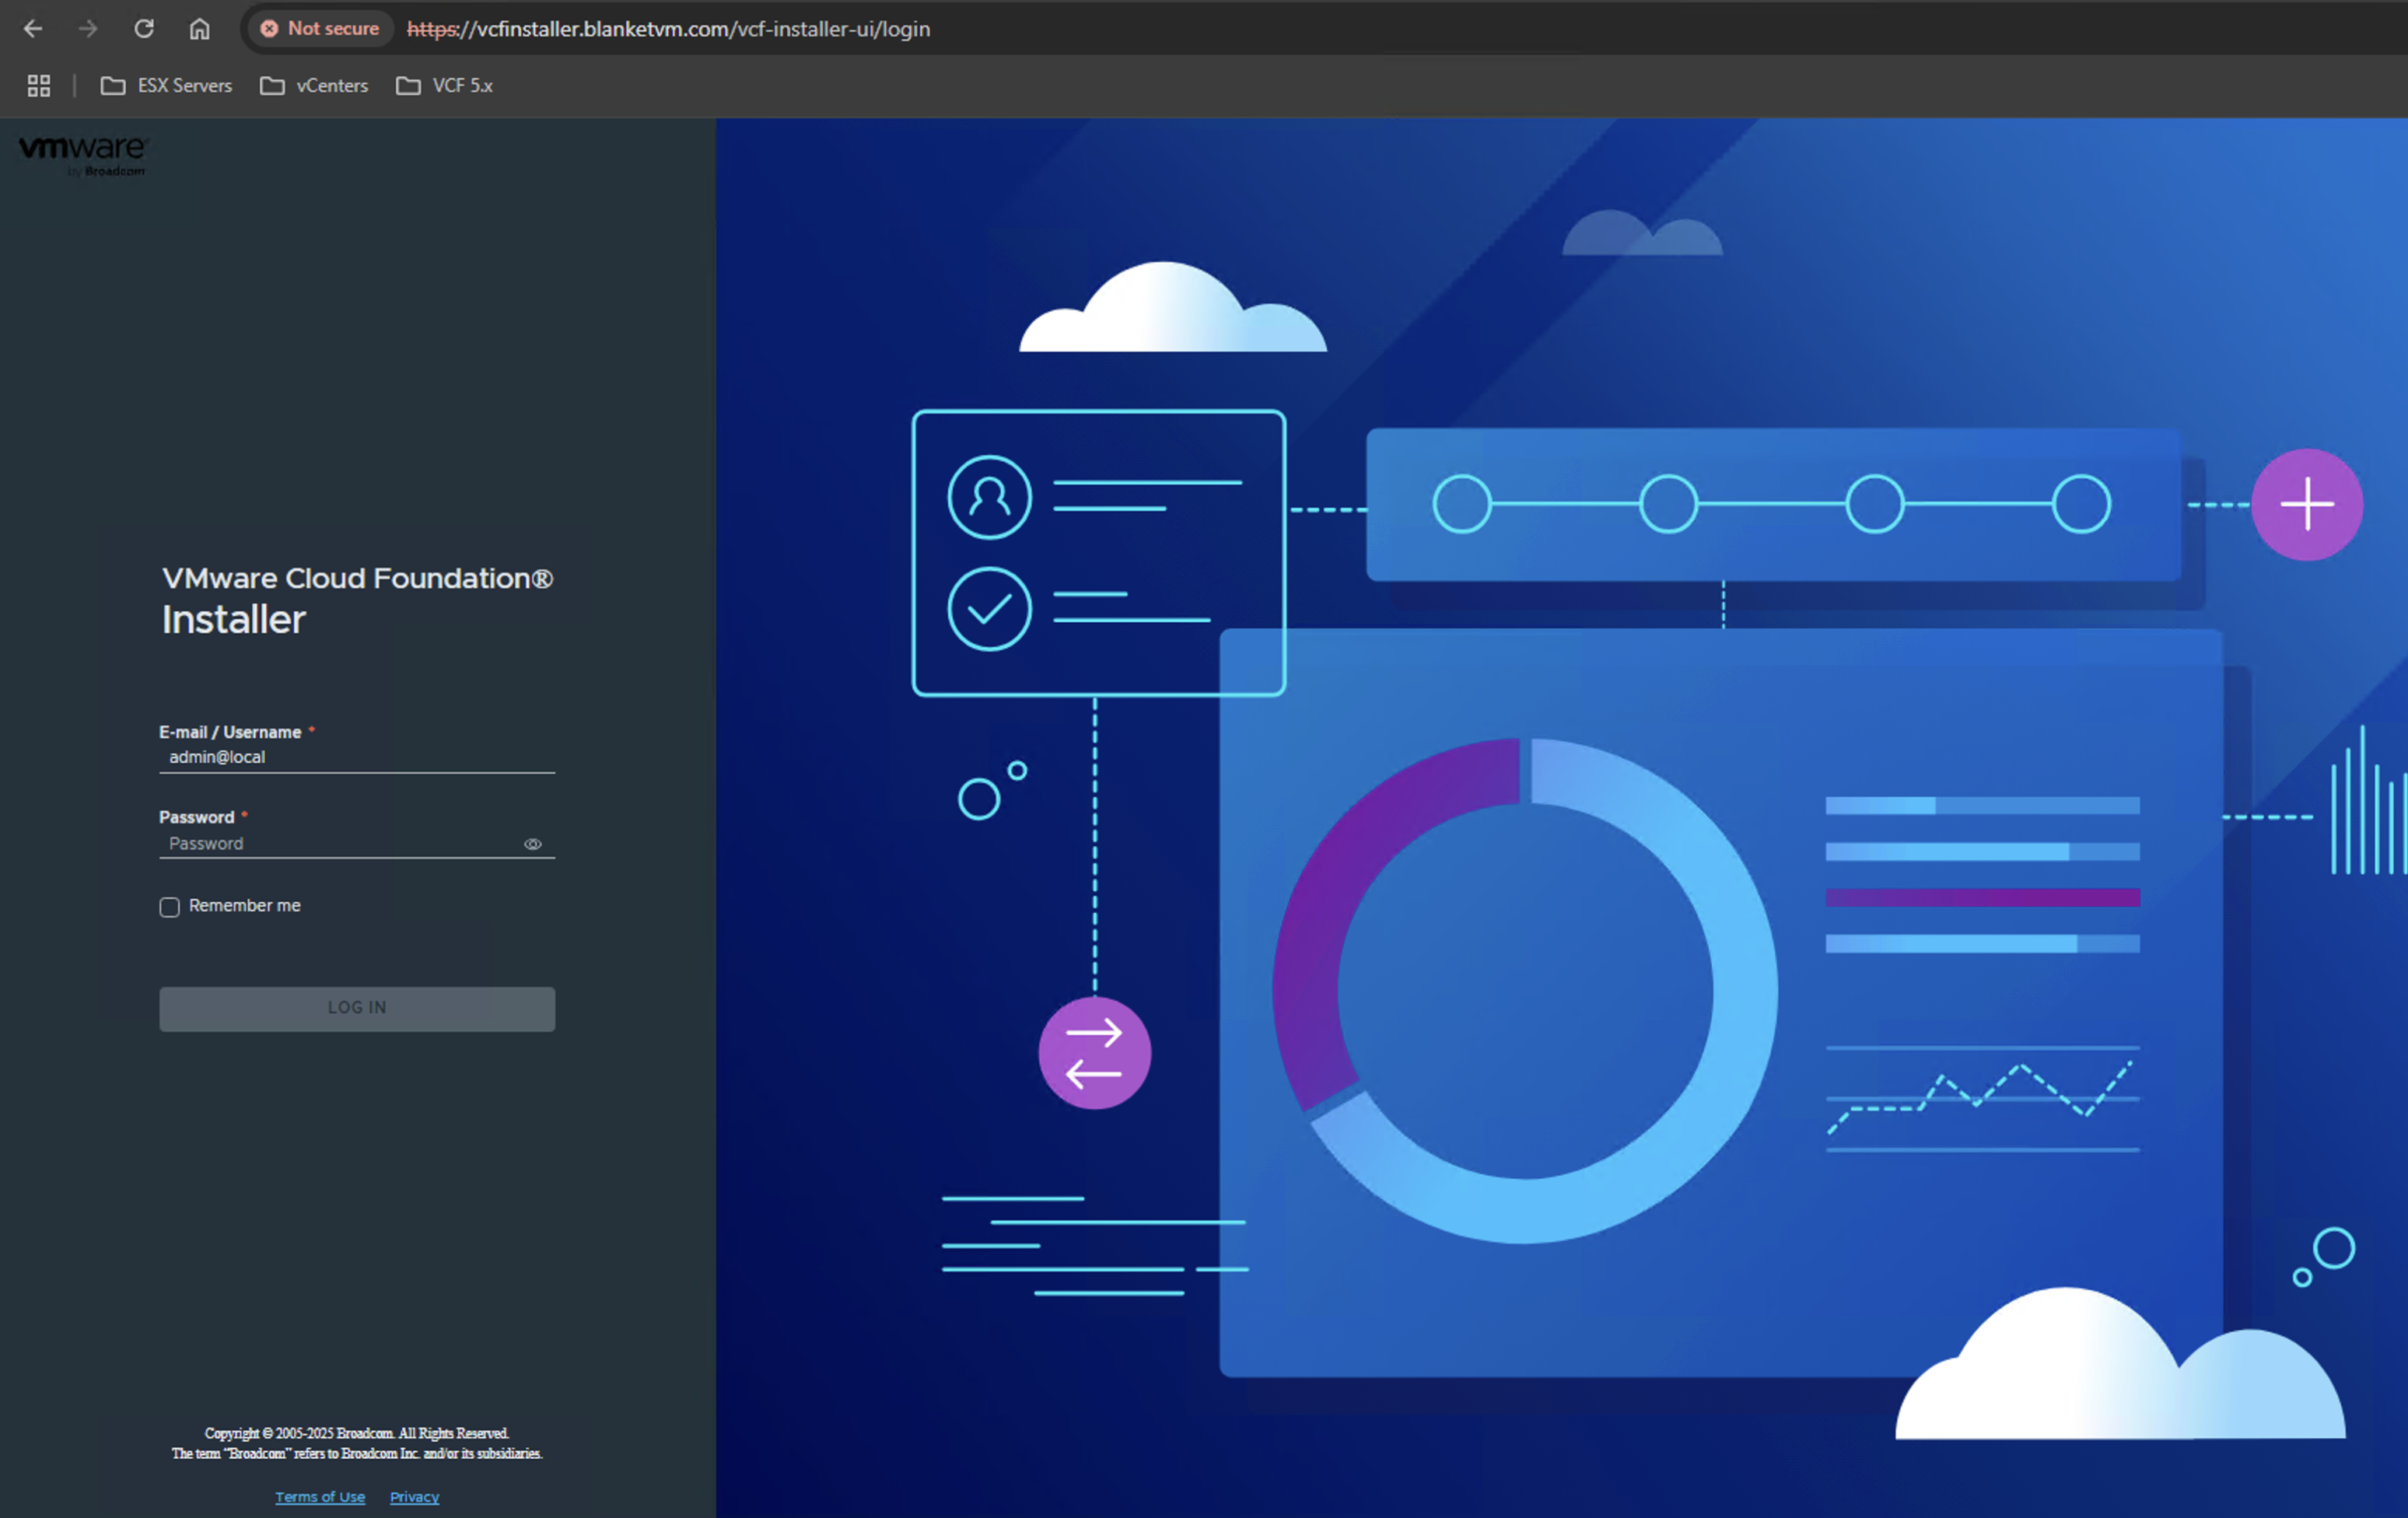
- After all Power On virtual machine, wait until all services will be running and open web browser to the VCF Installer:
Conclusion:
In this first part of the VCF 9 deployment series, we covered the key elements of topology, preparing ESXi hosts, and deploying the VCF Installer. Laying this groundwork correctly is essential for a smooth and successful installation.
Stay tuned for the next post, where we’ll walk through deploying the Management Domain.

10 thoughts on “VCF 9 Deployment PART1: Topology, ESX Host Preparation and VCF Installer deployment”